• Home
  • Contact
    • About
  • Resources
    • Disclosure
  • Privacy
  • Shop
    • Bloglovin
    • Email
    • Facebook
    • Instagram
    • Pinterest
    • Twitter

A Shade Of Teal

  • Blog
  • DIY
    • Crafts
    • Shopping Guides
    • Gift Baskets
    • Furniture Makeovers
  • Home & Decor
    • Home Projects
    • Home Decor
    • Seasonal Decor
    • Parties
    • One Room Challenge
  • Design
    • Printables
    • Design Boards
    • Color Series
    • Weekly Fav’s Wednesday
  • Life
    • Family & Kids
    • Food
    • Clean & Organize
    • Pets
    • Technology
  • Disney
  • Cricut

Decor DIY Home Decor Home Projects

Entryway Makeover: How to Add Trim + Board & Batten

You may remember I got a new front door about a year ago (see more here). When that happened, I painted the exterior of the door and updated my porch at the same time. In more recent months I finally got around to giving the interior side a major makeover, which I share here. But now I’ll finally share how I updated my entryway with trim and a board and batten wall while on a budget!

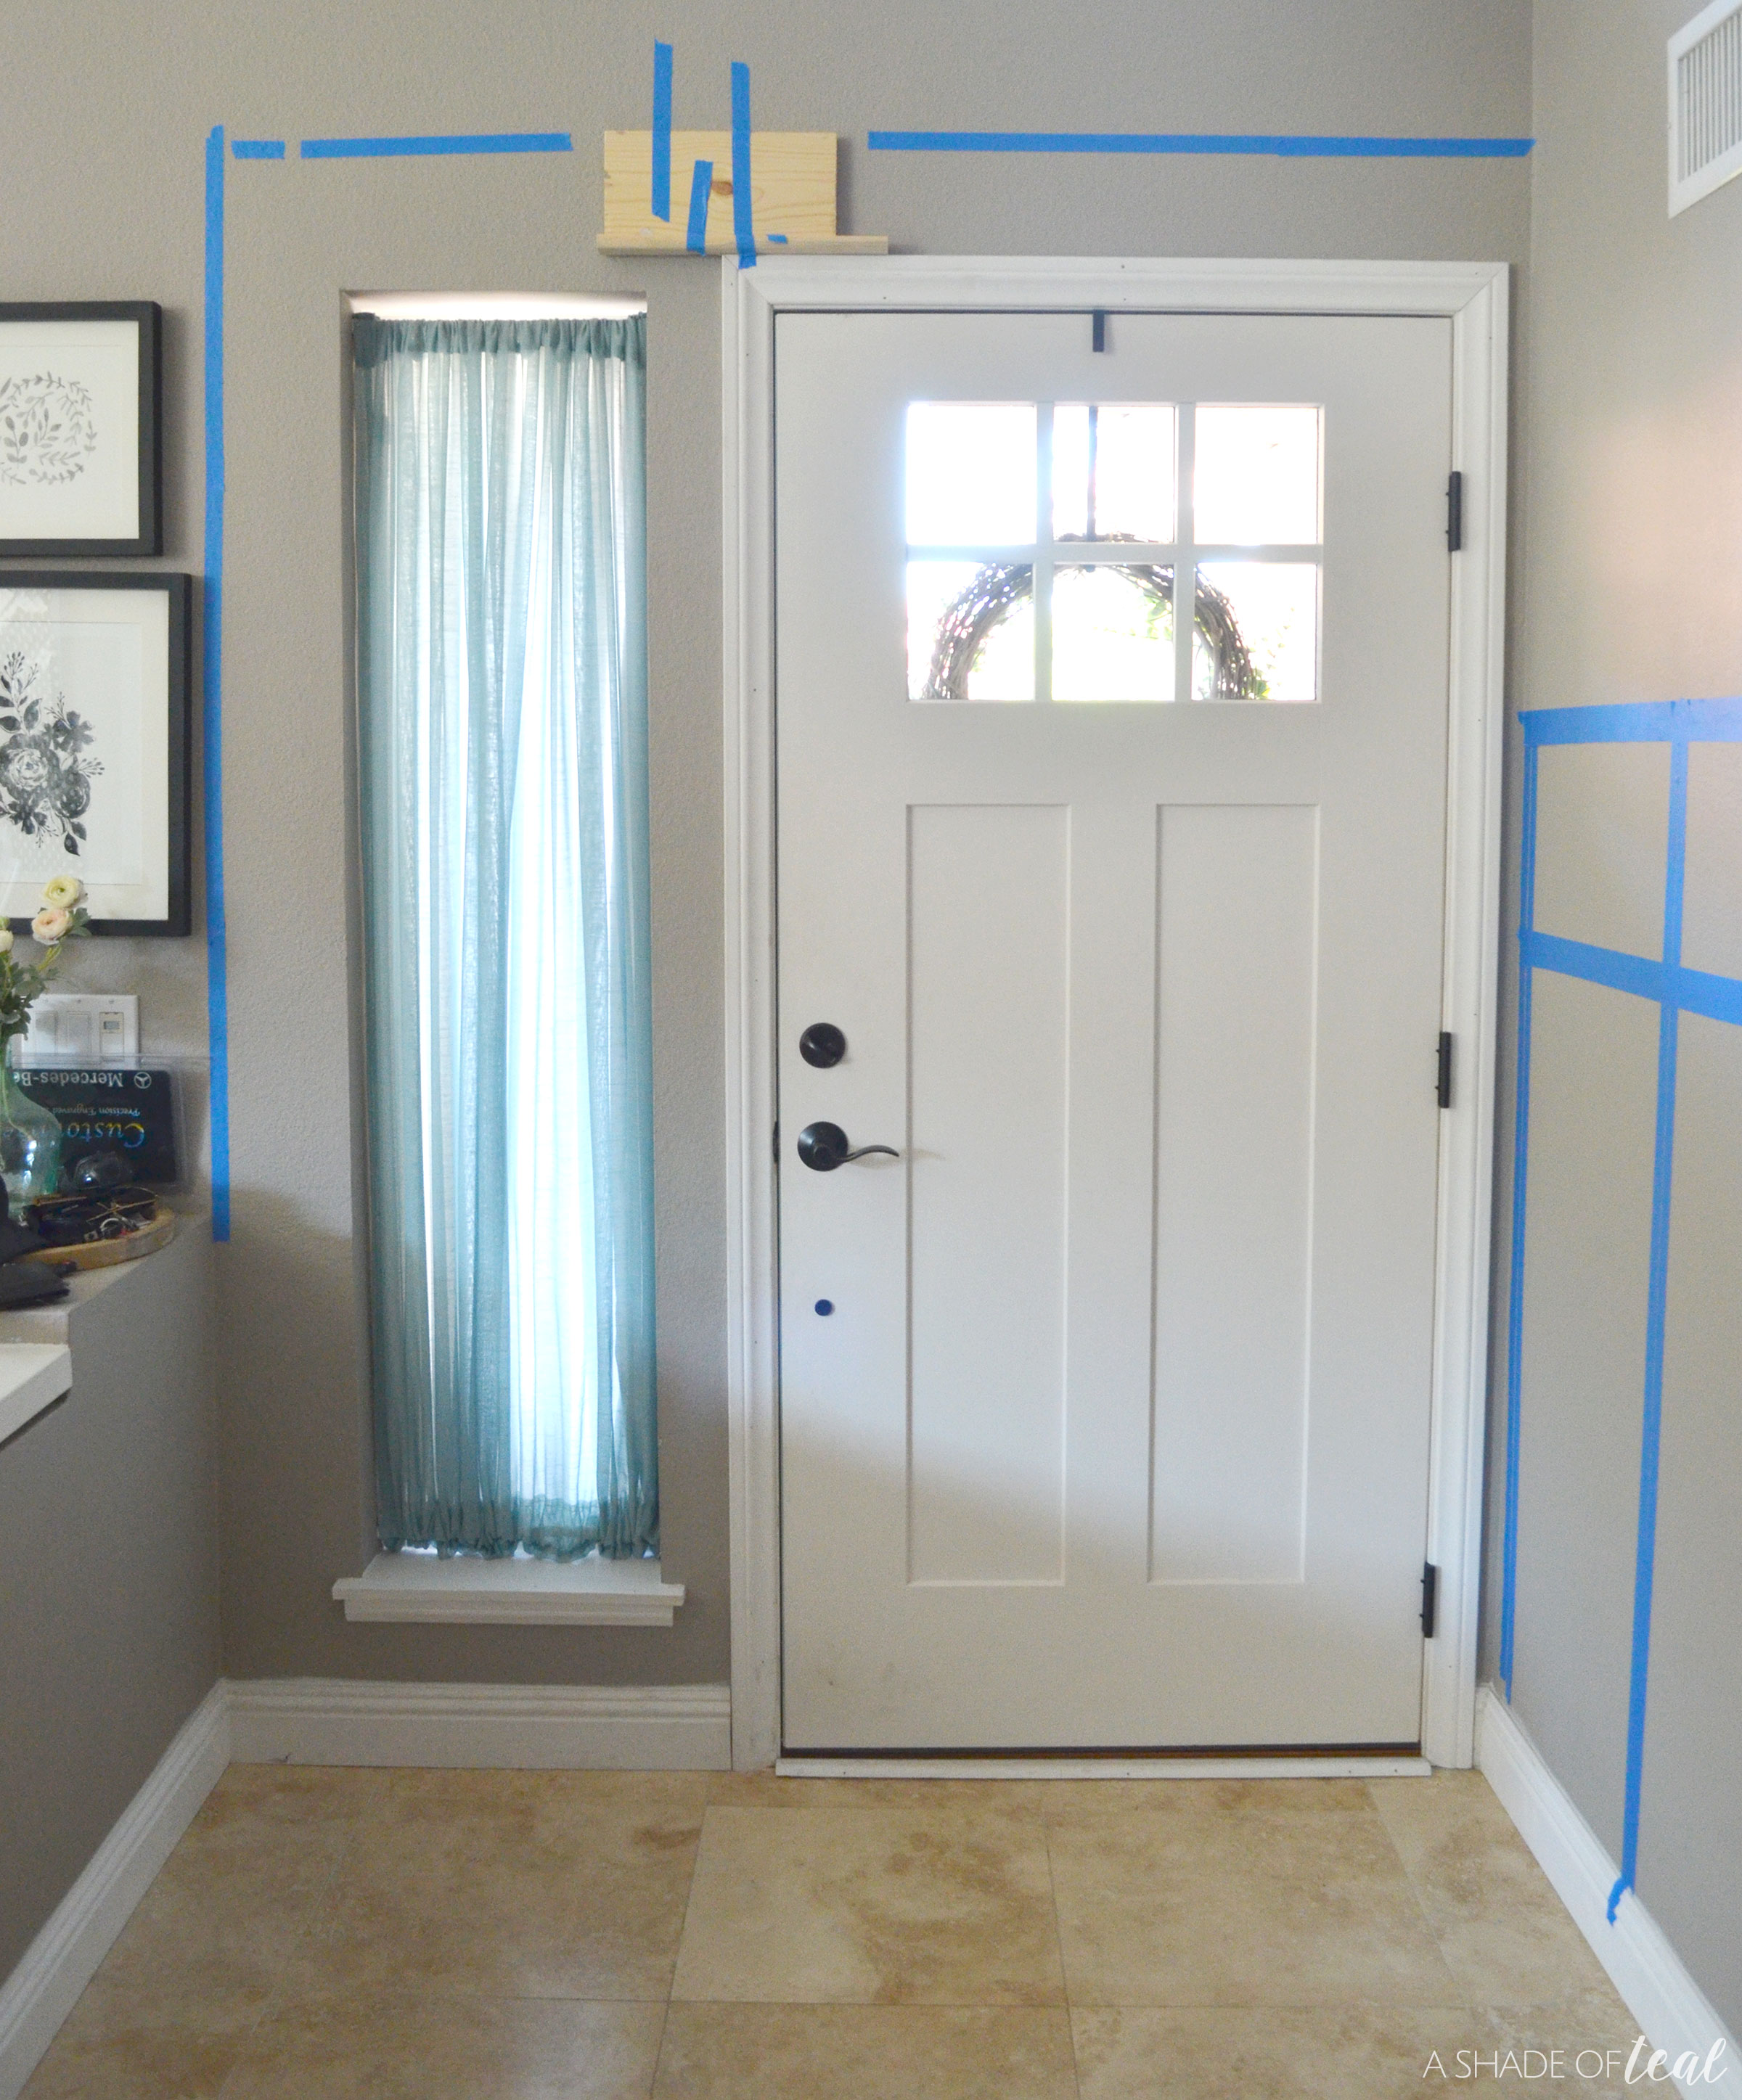
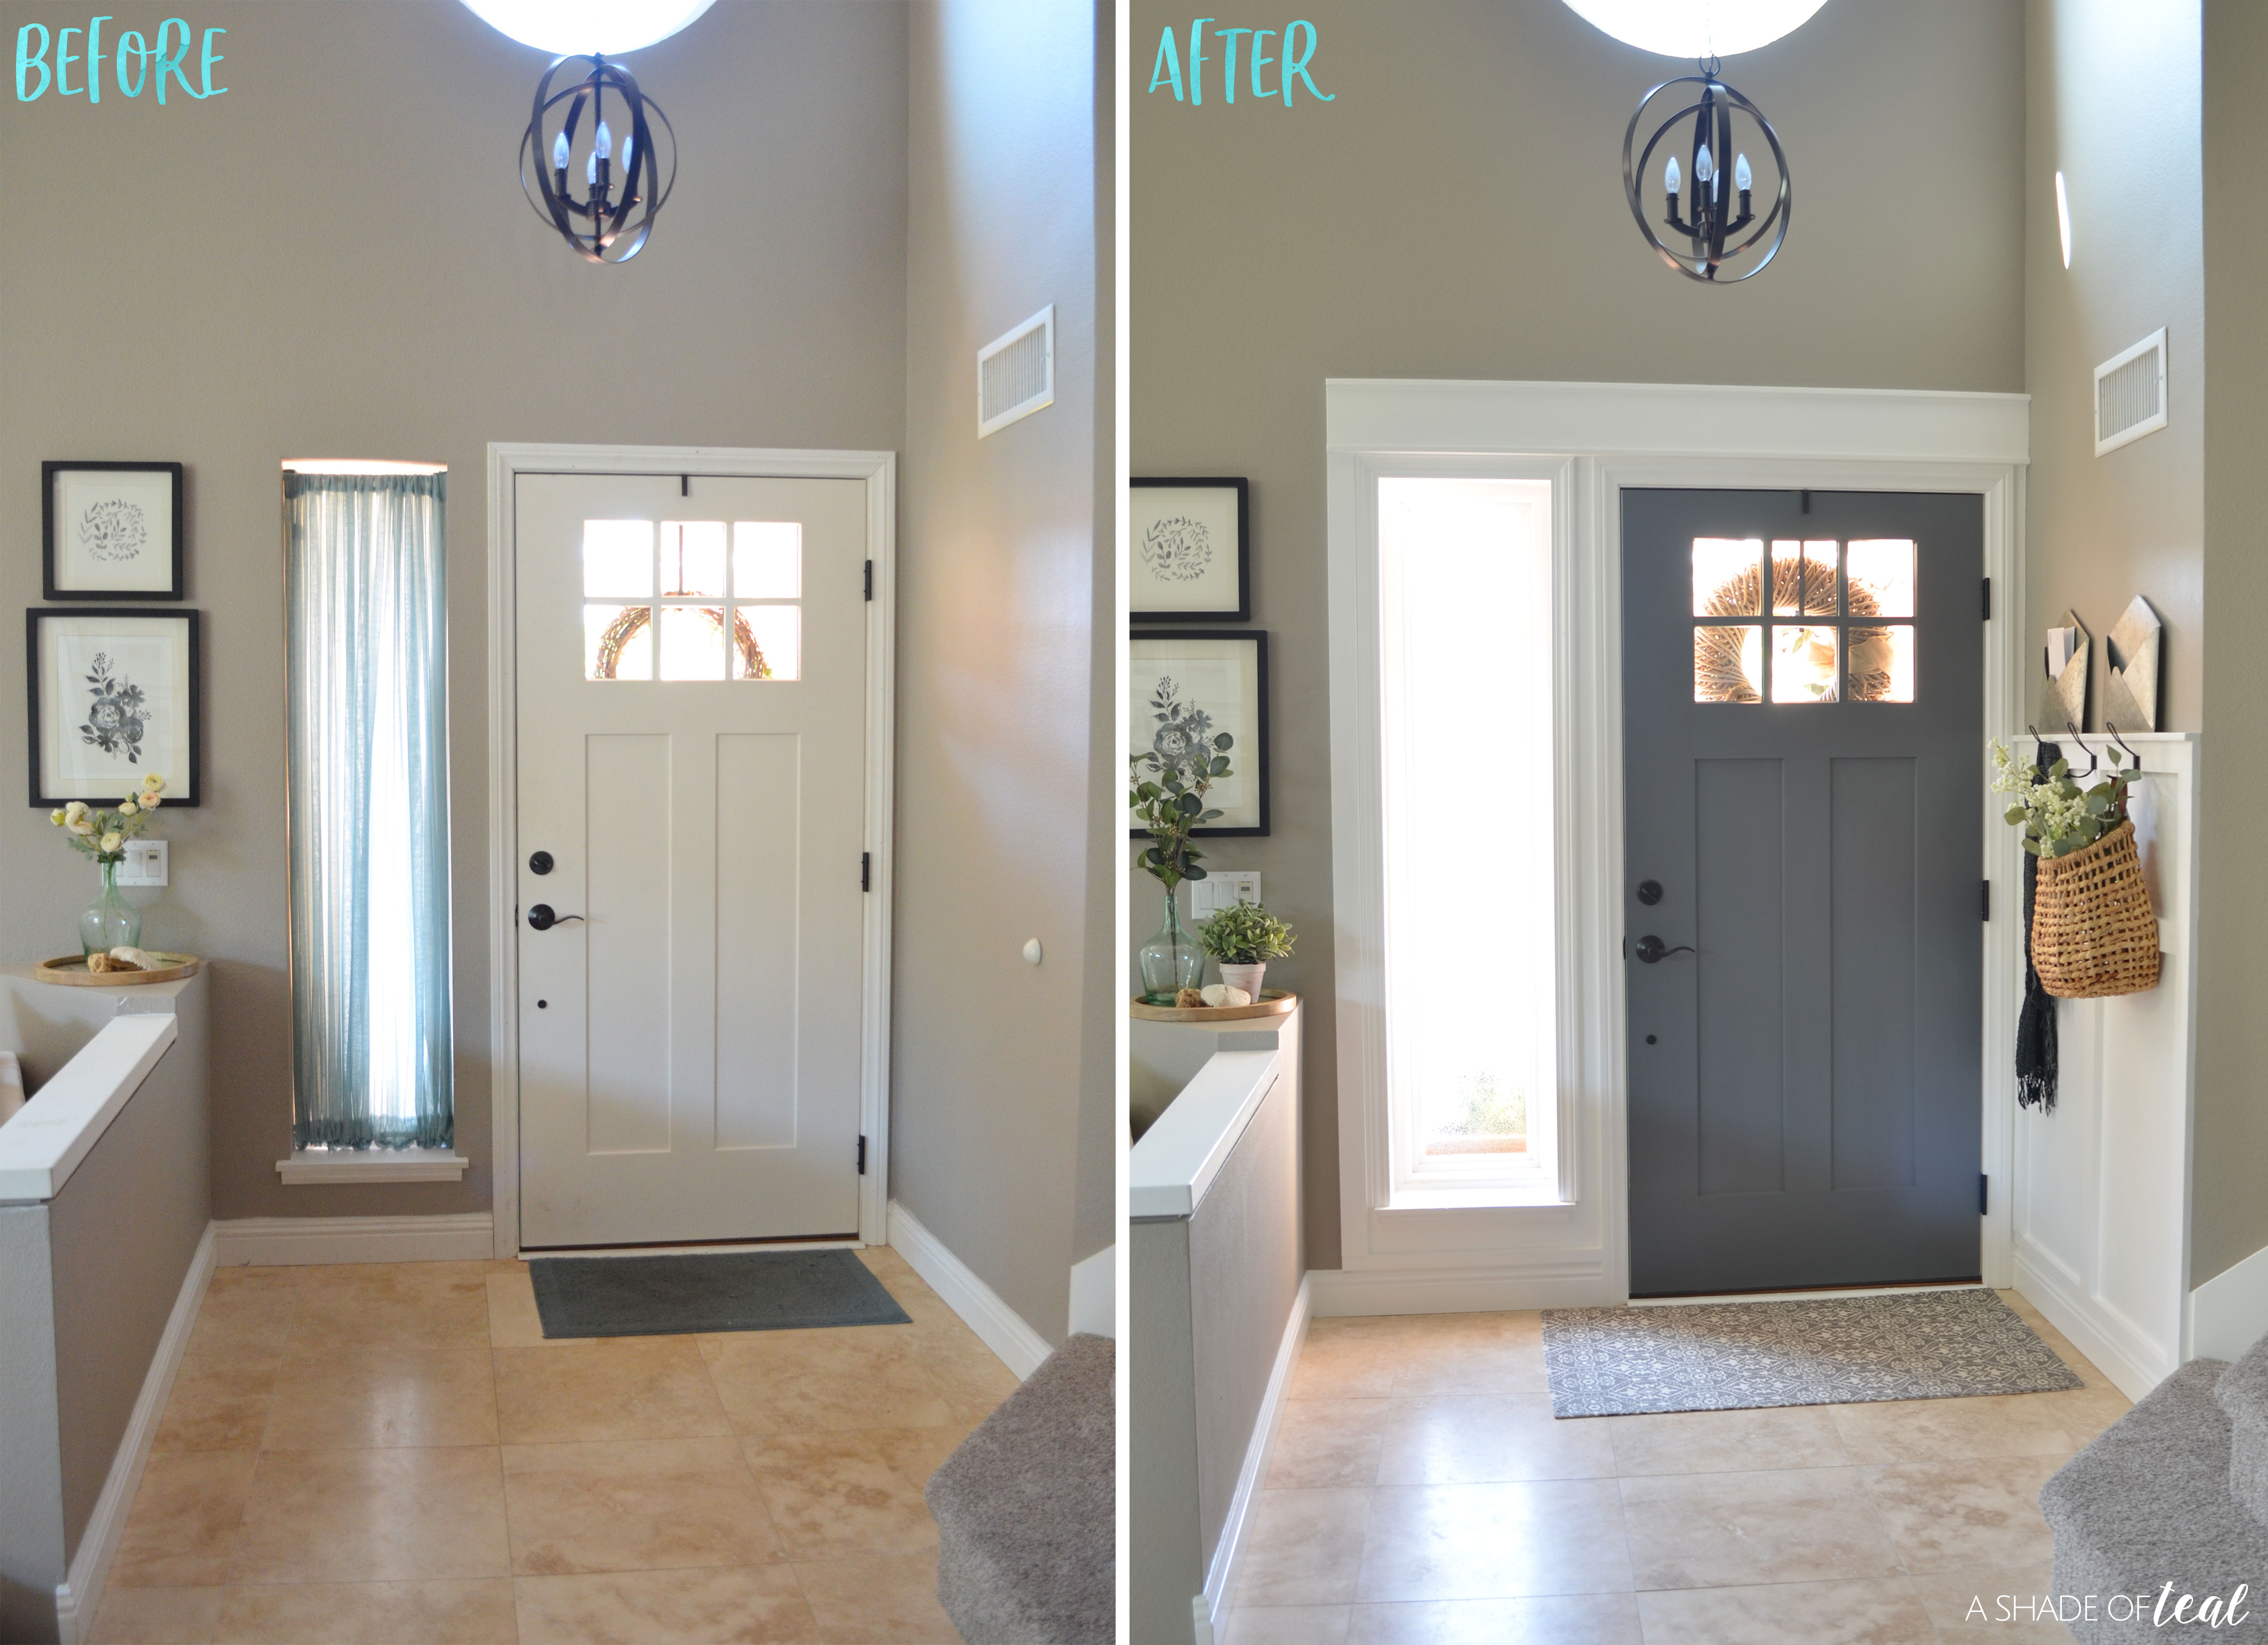
Before, my entryway was boring and lacking any charm. I honestly hated the feel and look. Definitely not the first impression I was hoping to give off. So, I knew I wanted to make a change and I also knew it had to be on a budget. You can see from the below picture it felt boring and unfinished.

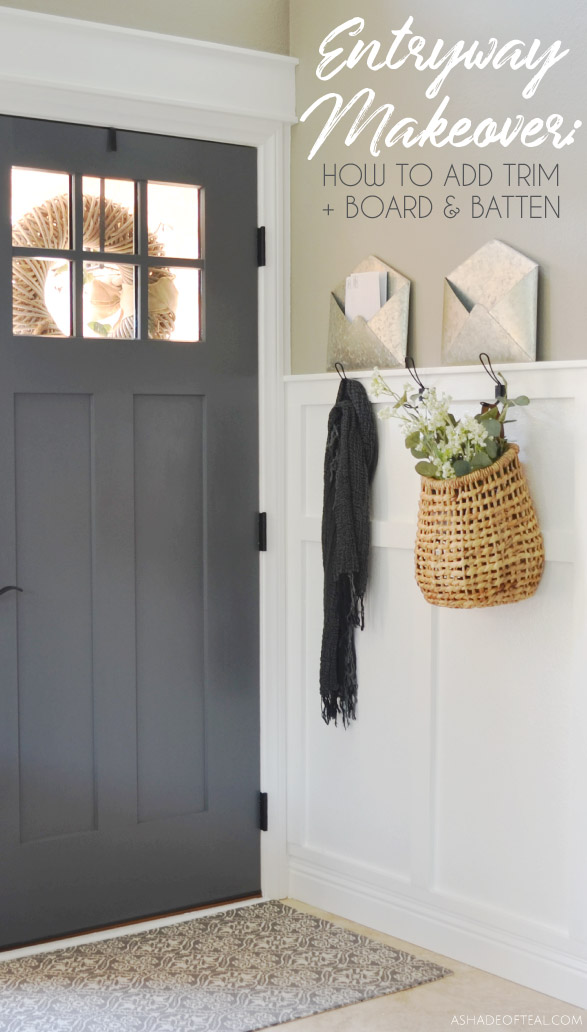
So want to know how I gave my Entryway Makeover? Here’s how I added trim and Board & Batten around my front door.

Step 1

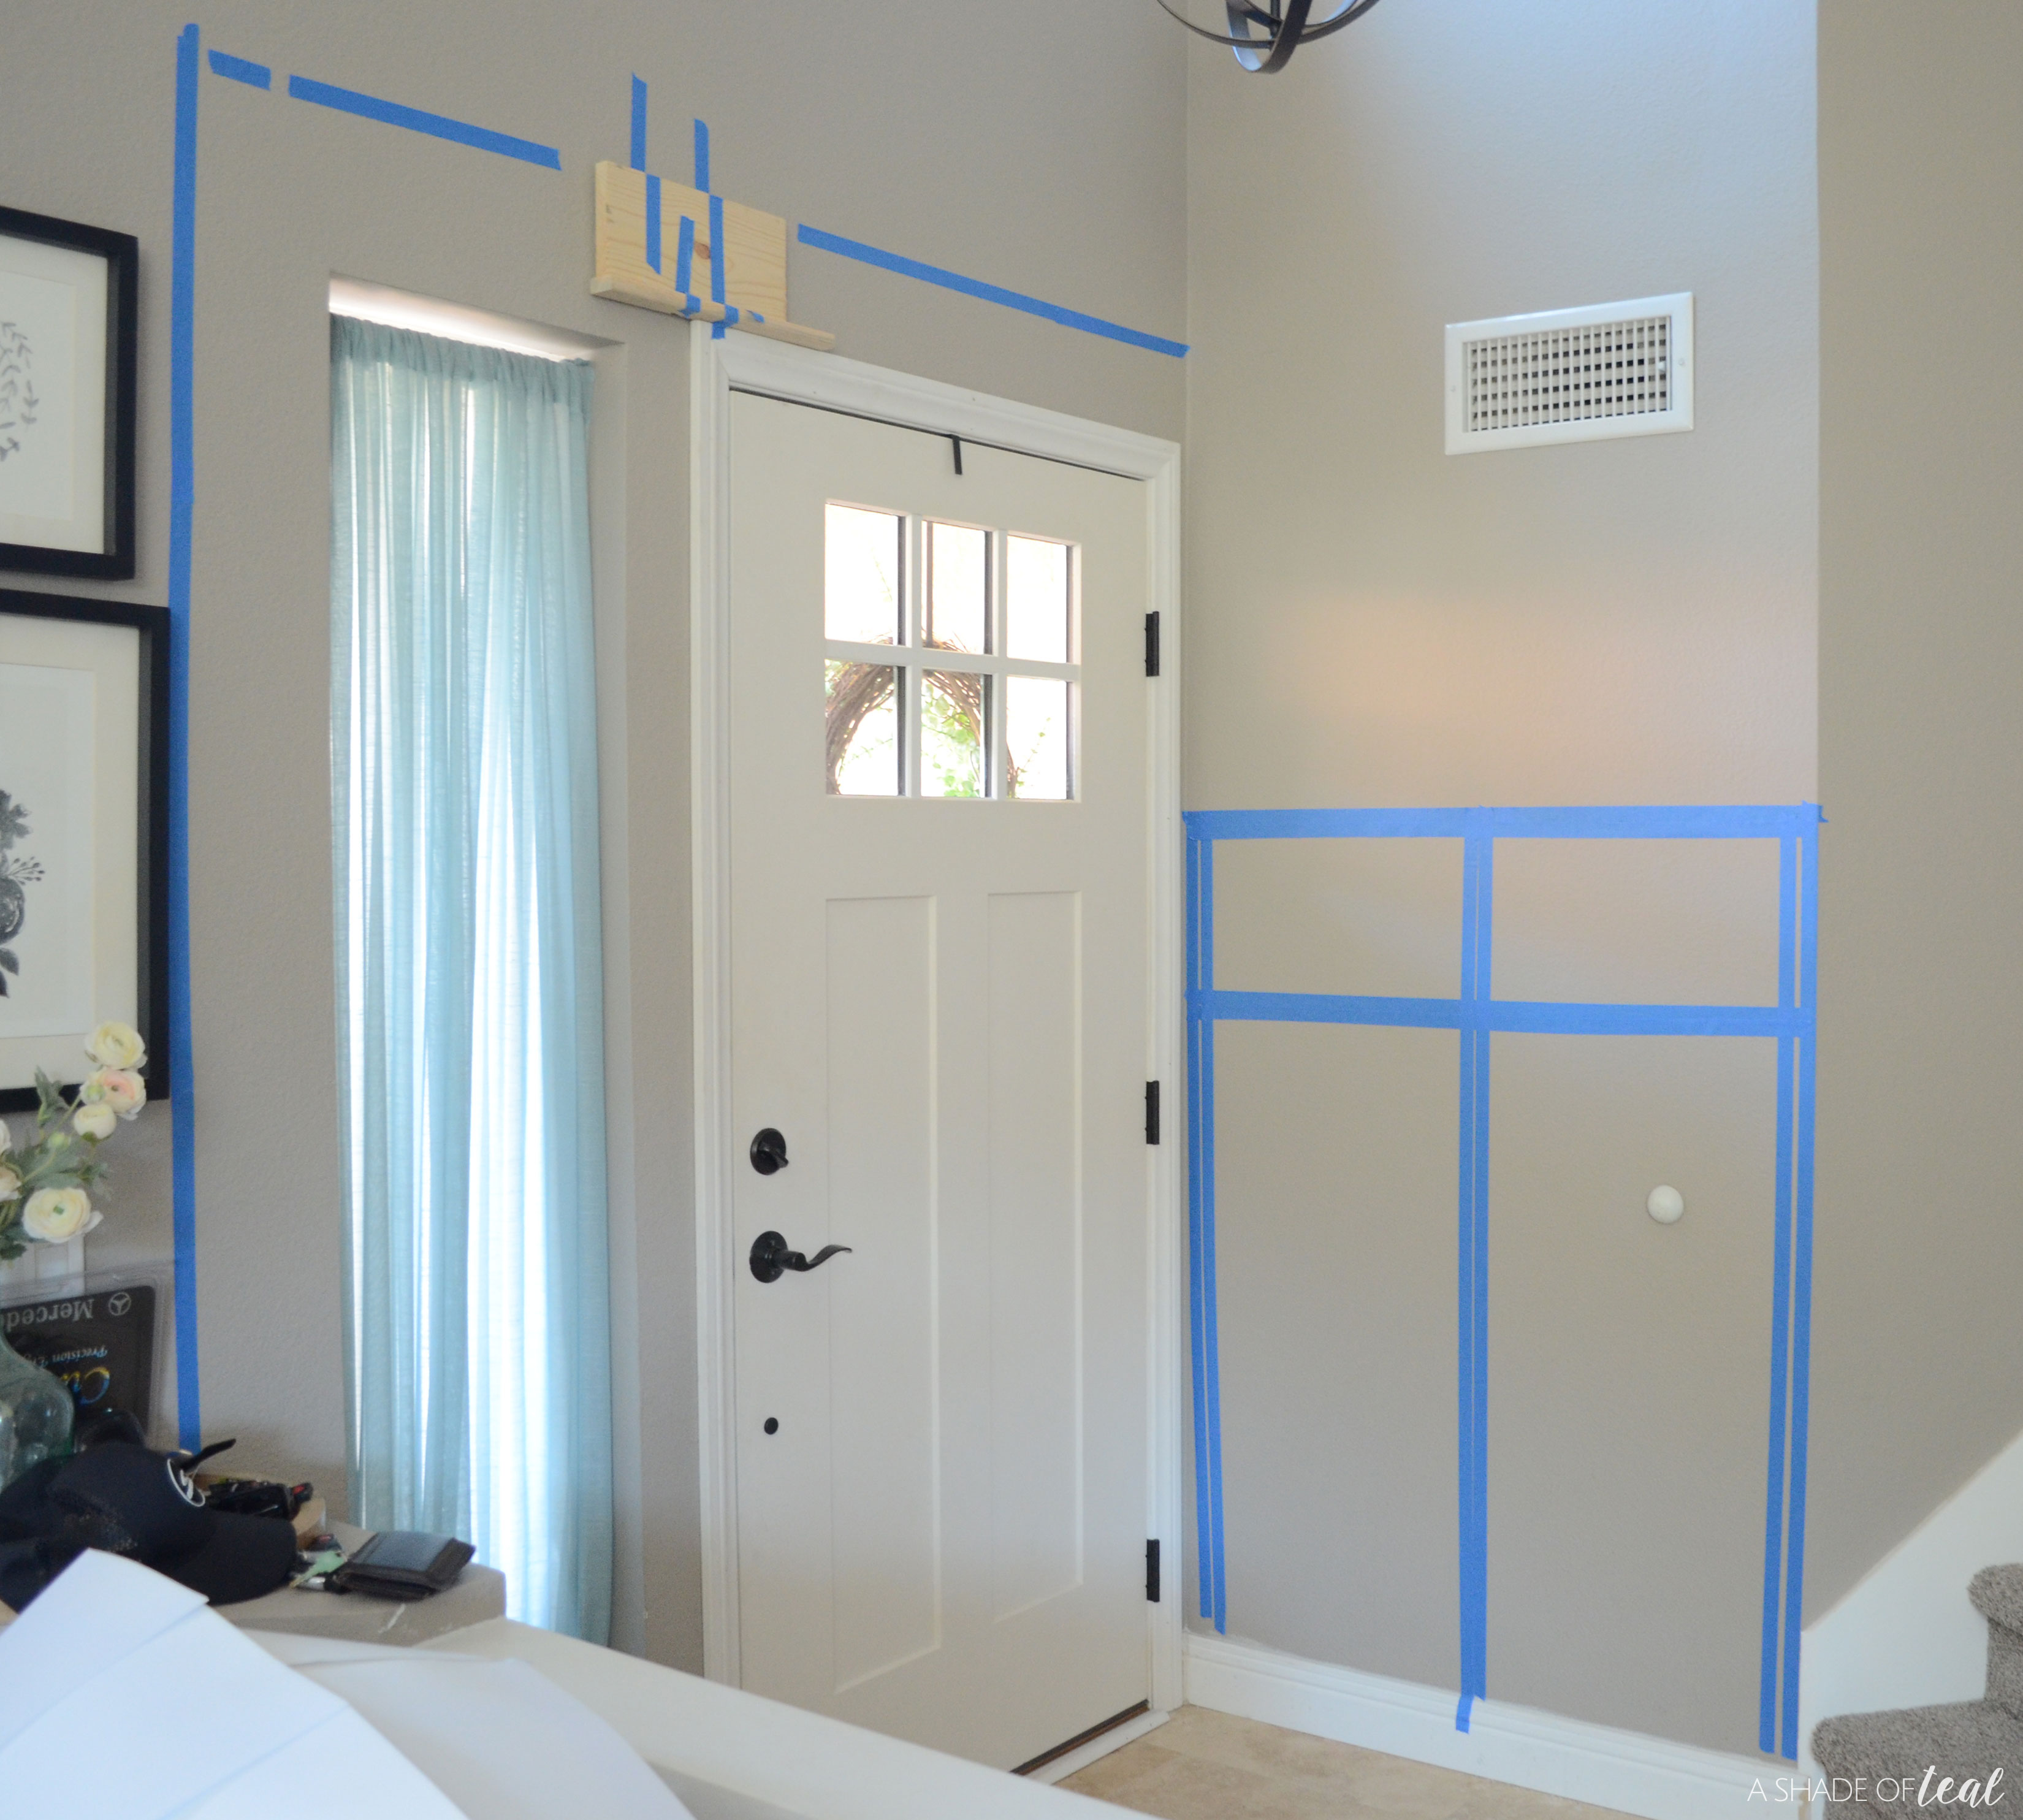
Make a plan. I taped up my rough idea of what I wanted, which included a board & batten wall with hooks for hanging. Initially this is all I had in mind. After I did that I realized how boring the front door area was so I played around with ways to update it. I loved the idea of adding a header, but I also knew I had to somehow trim out the side window.
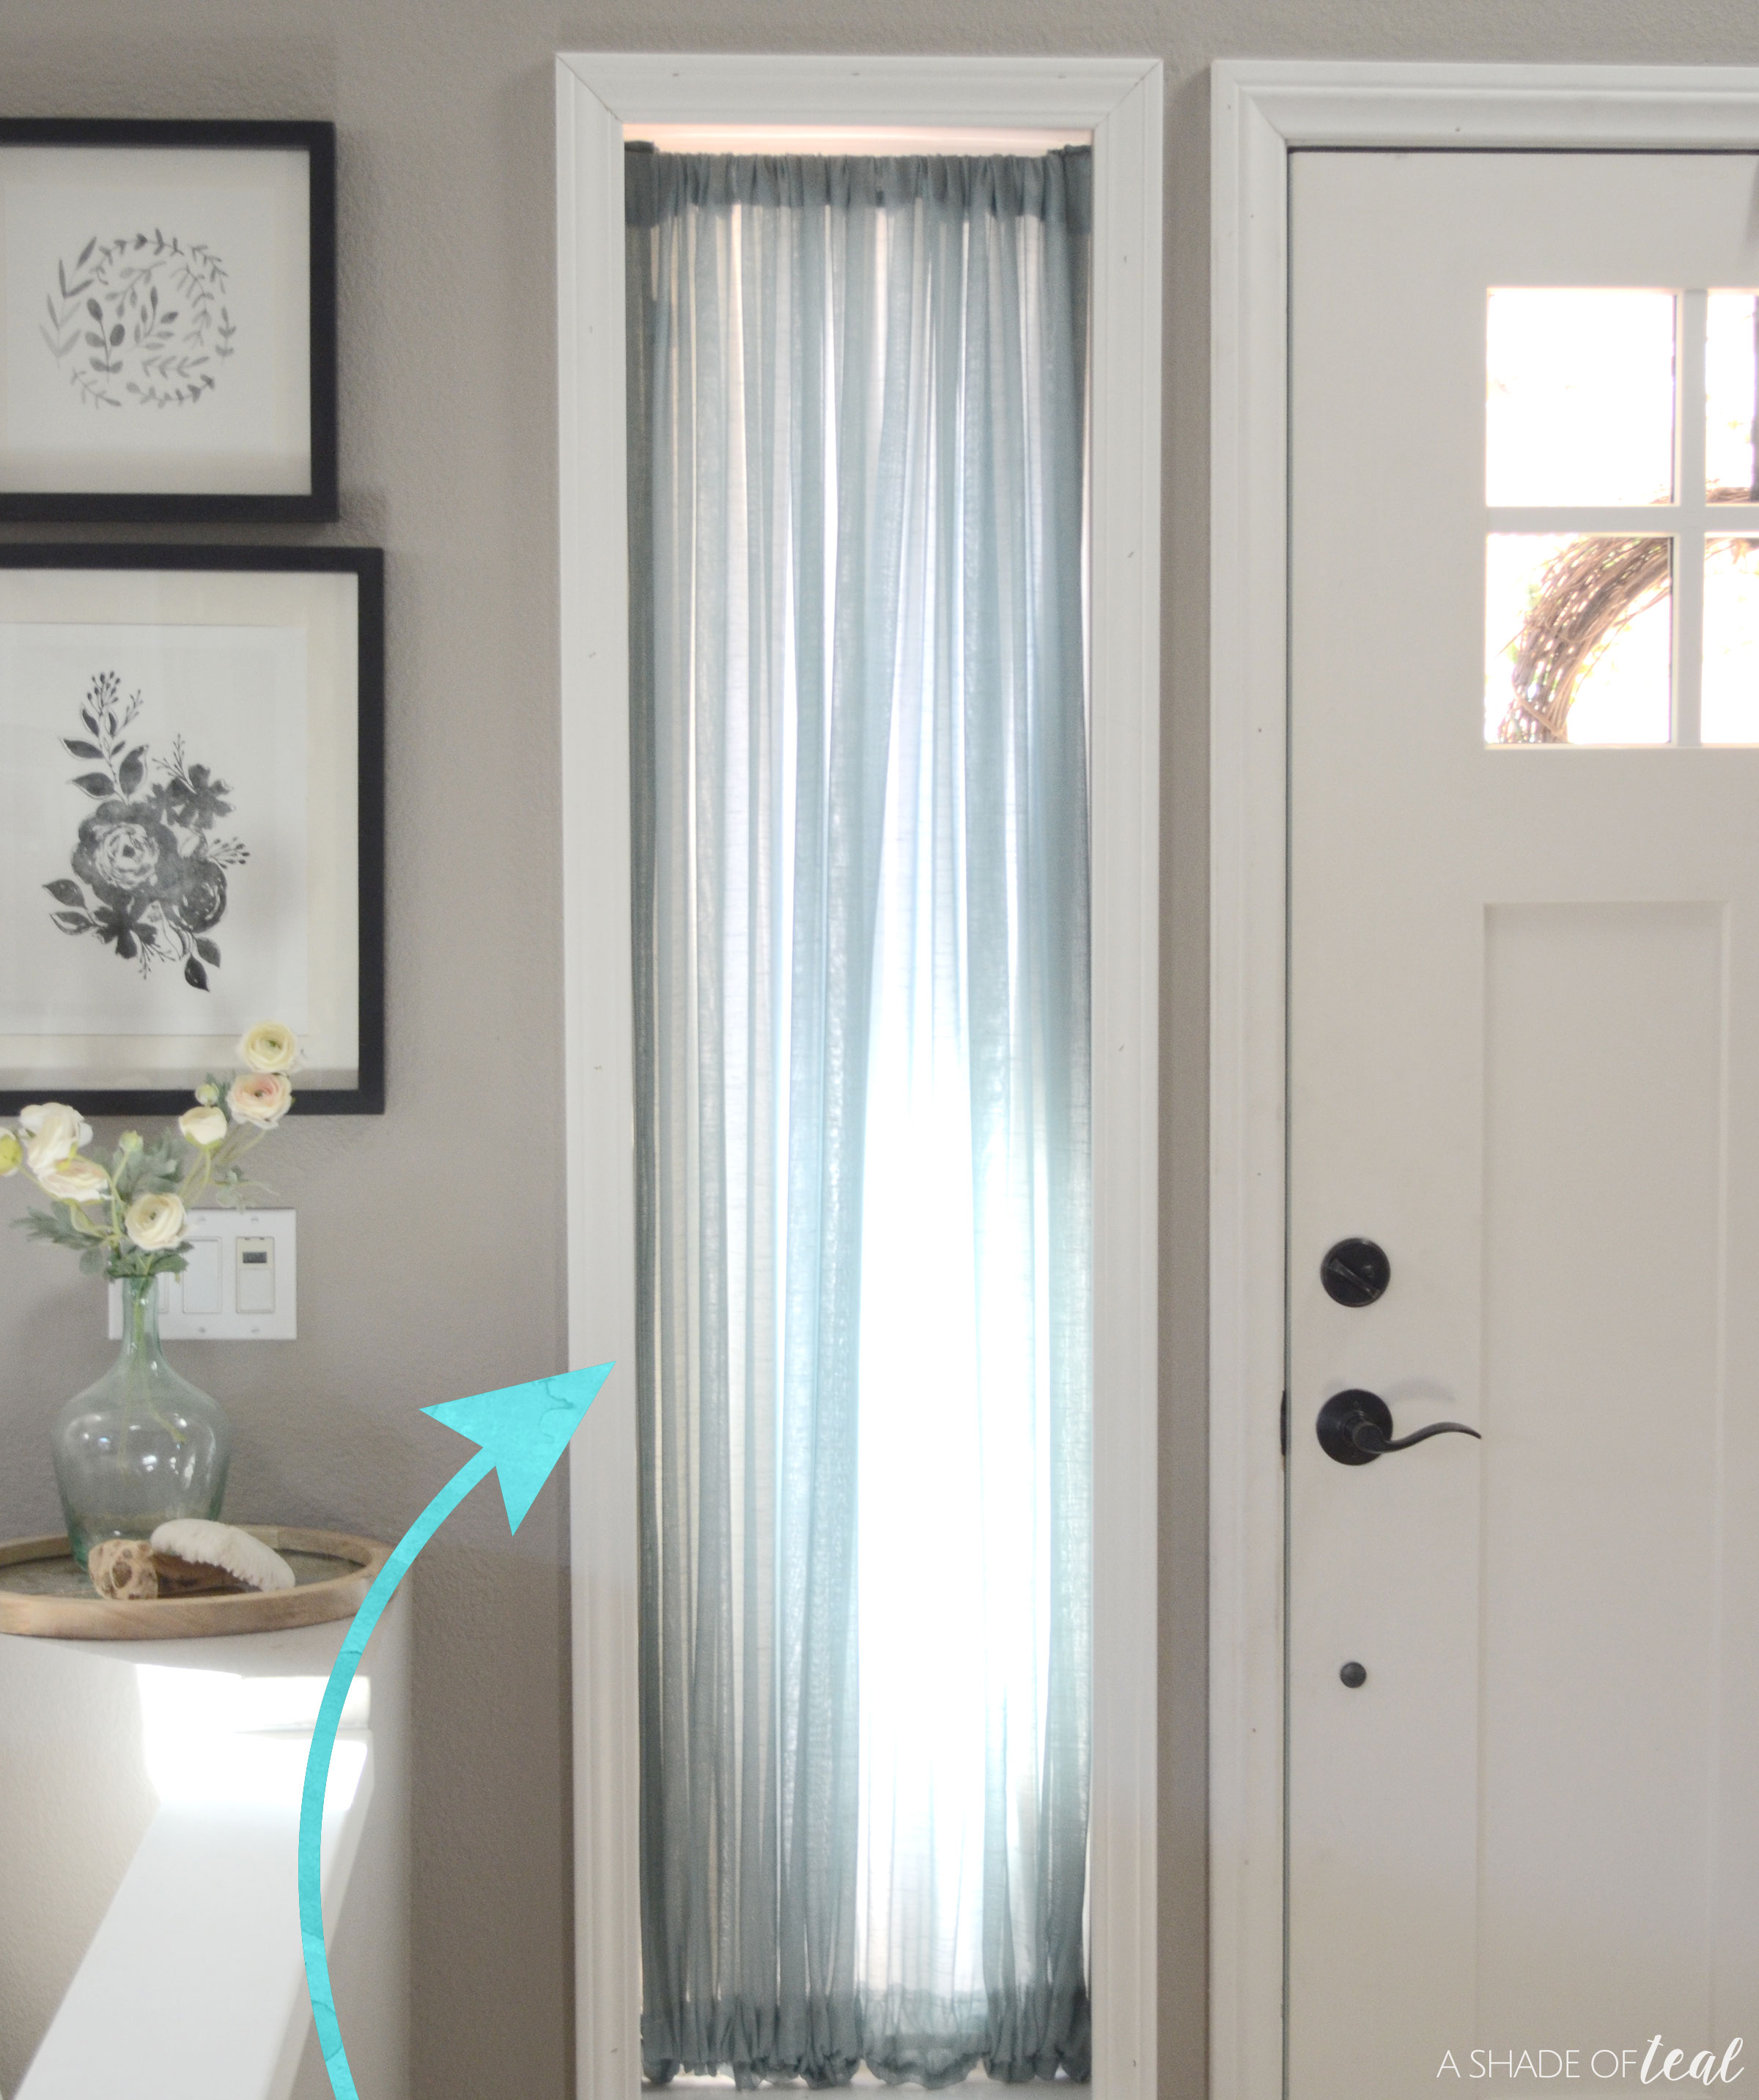
Step 2

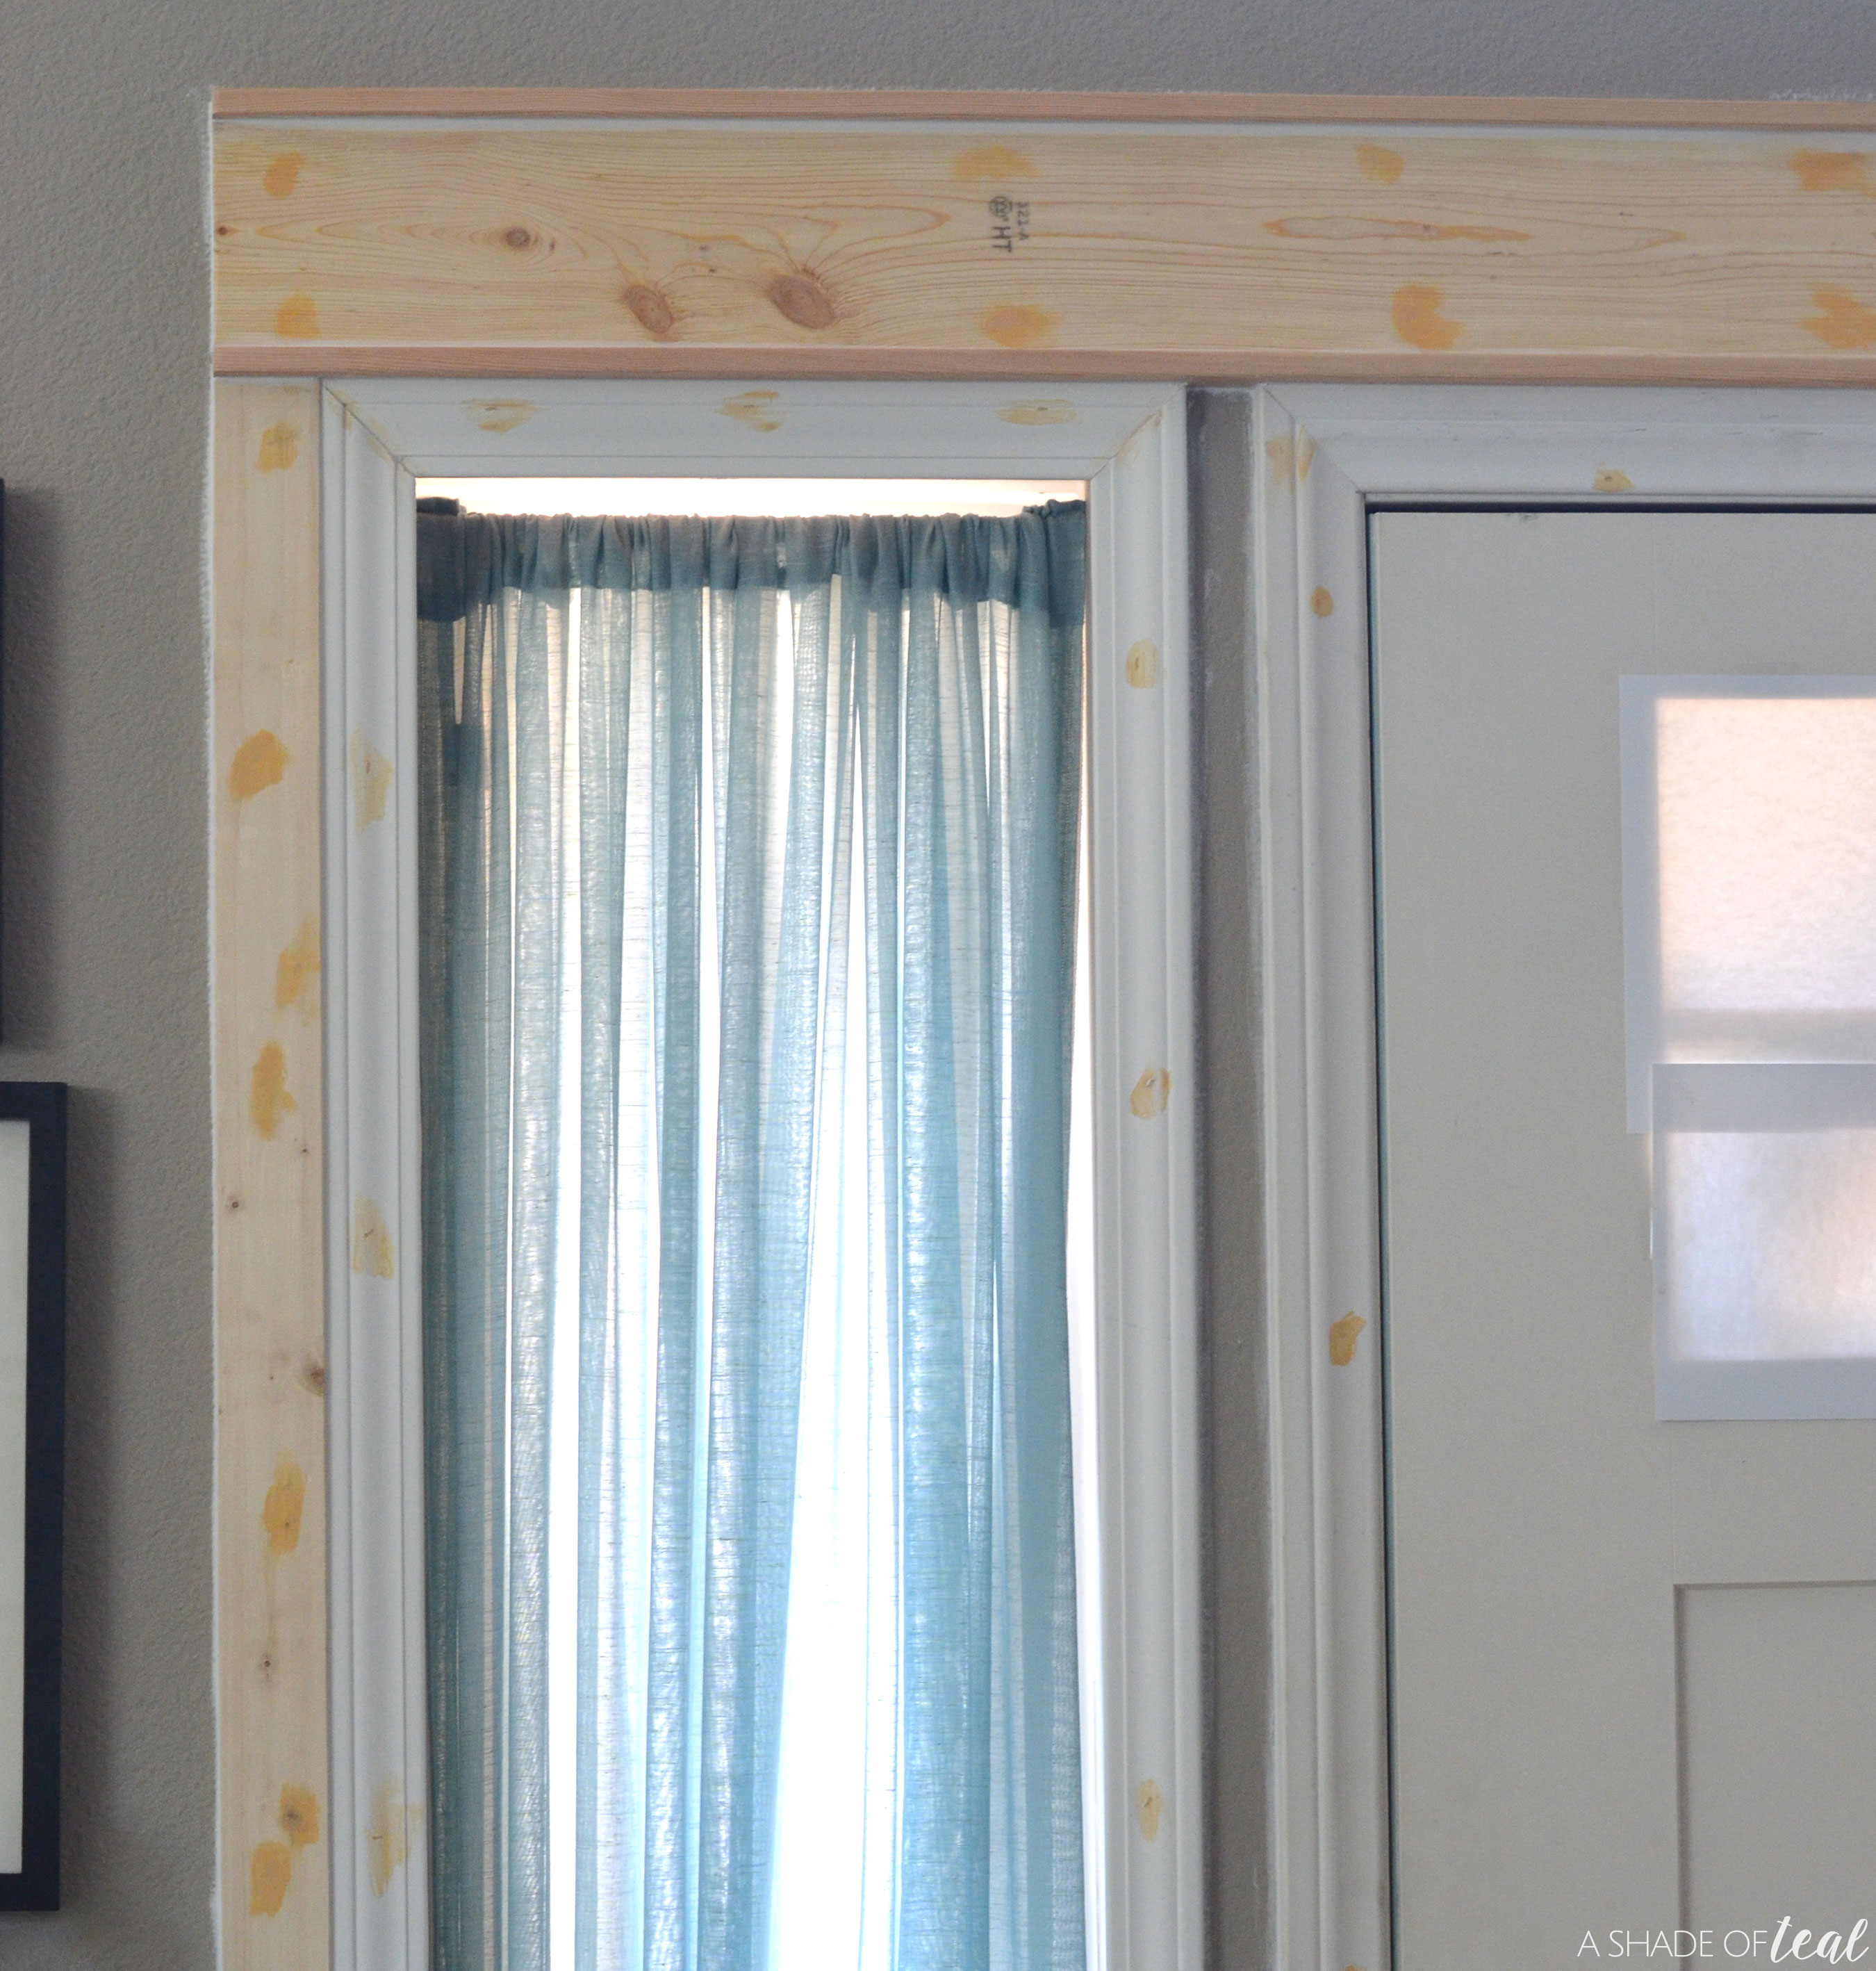
Start adding trim. First, I added 2 1/2″ molding to the side window since I was trying to match the door molding.

Step 3

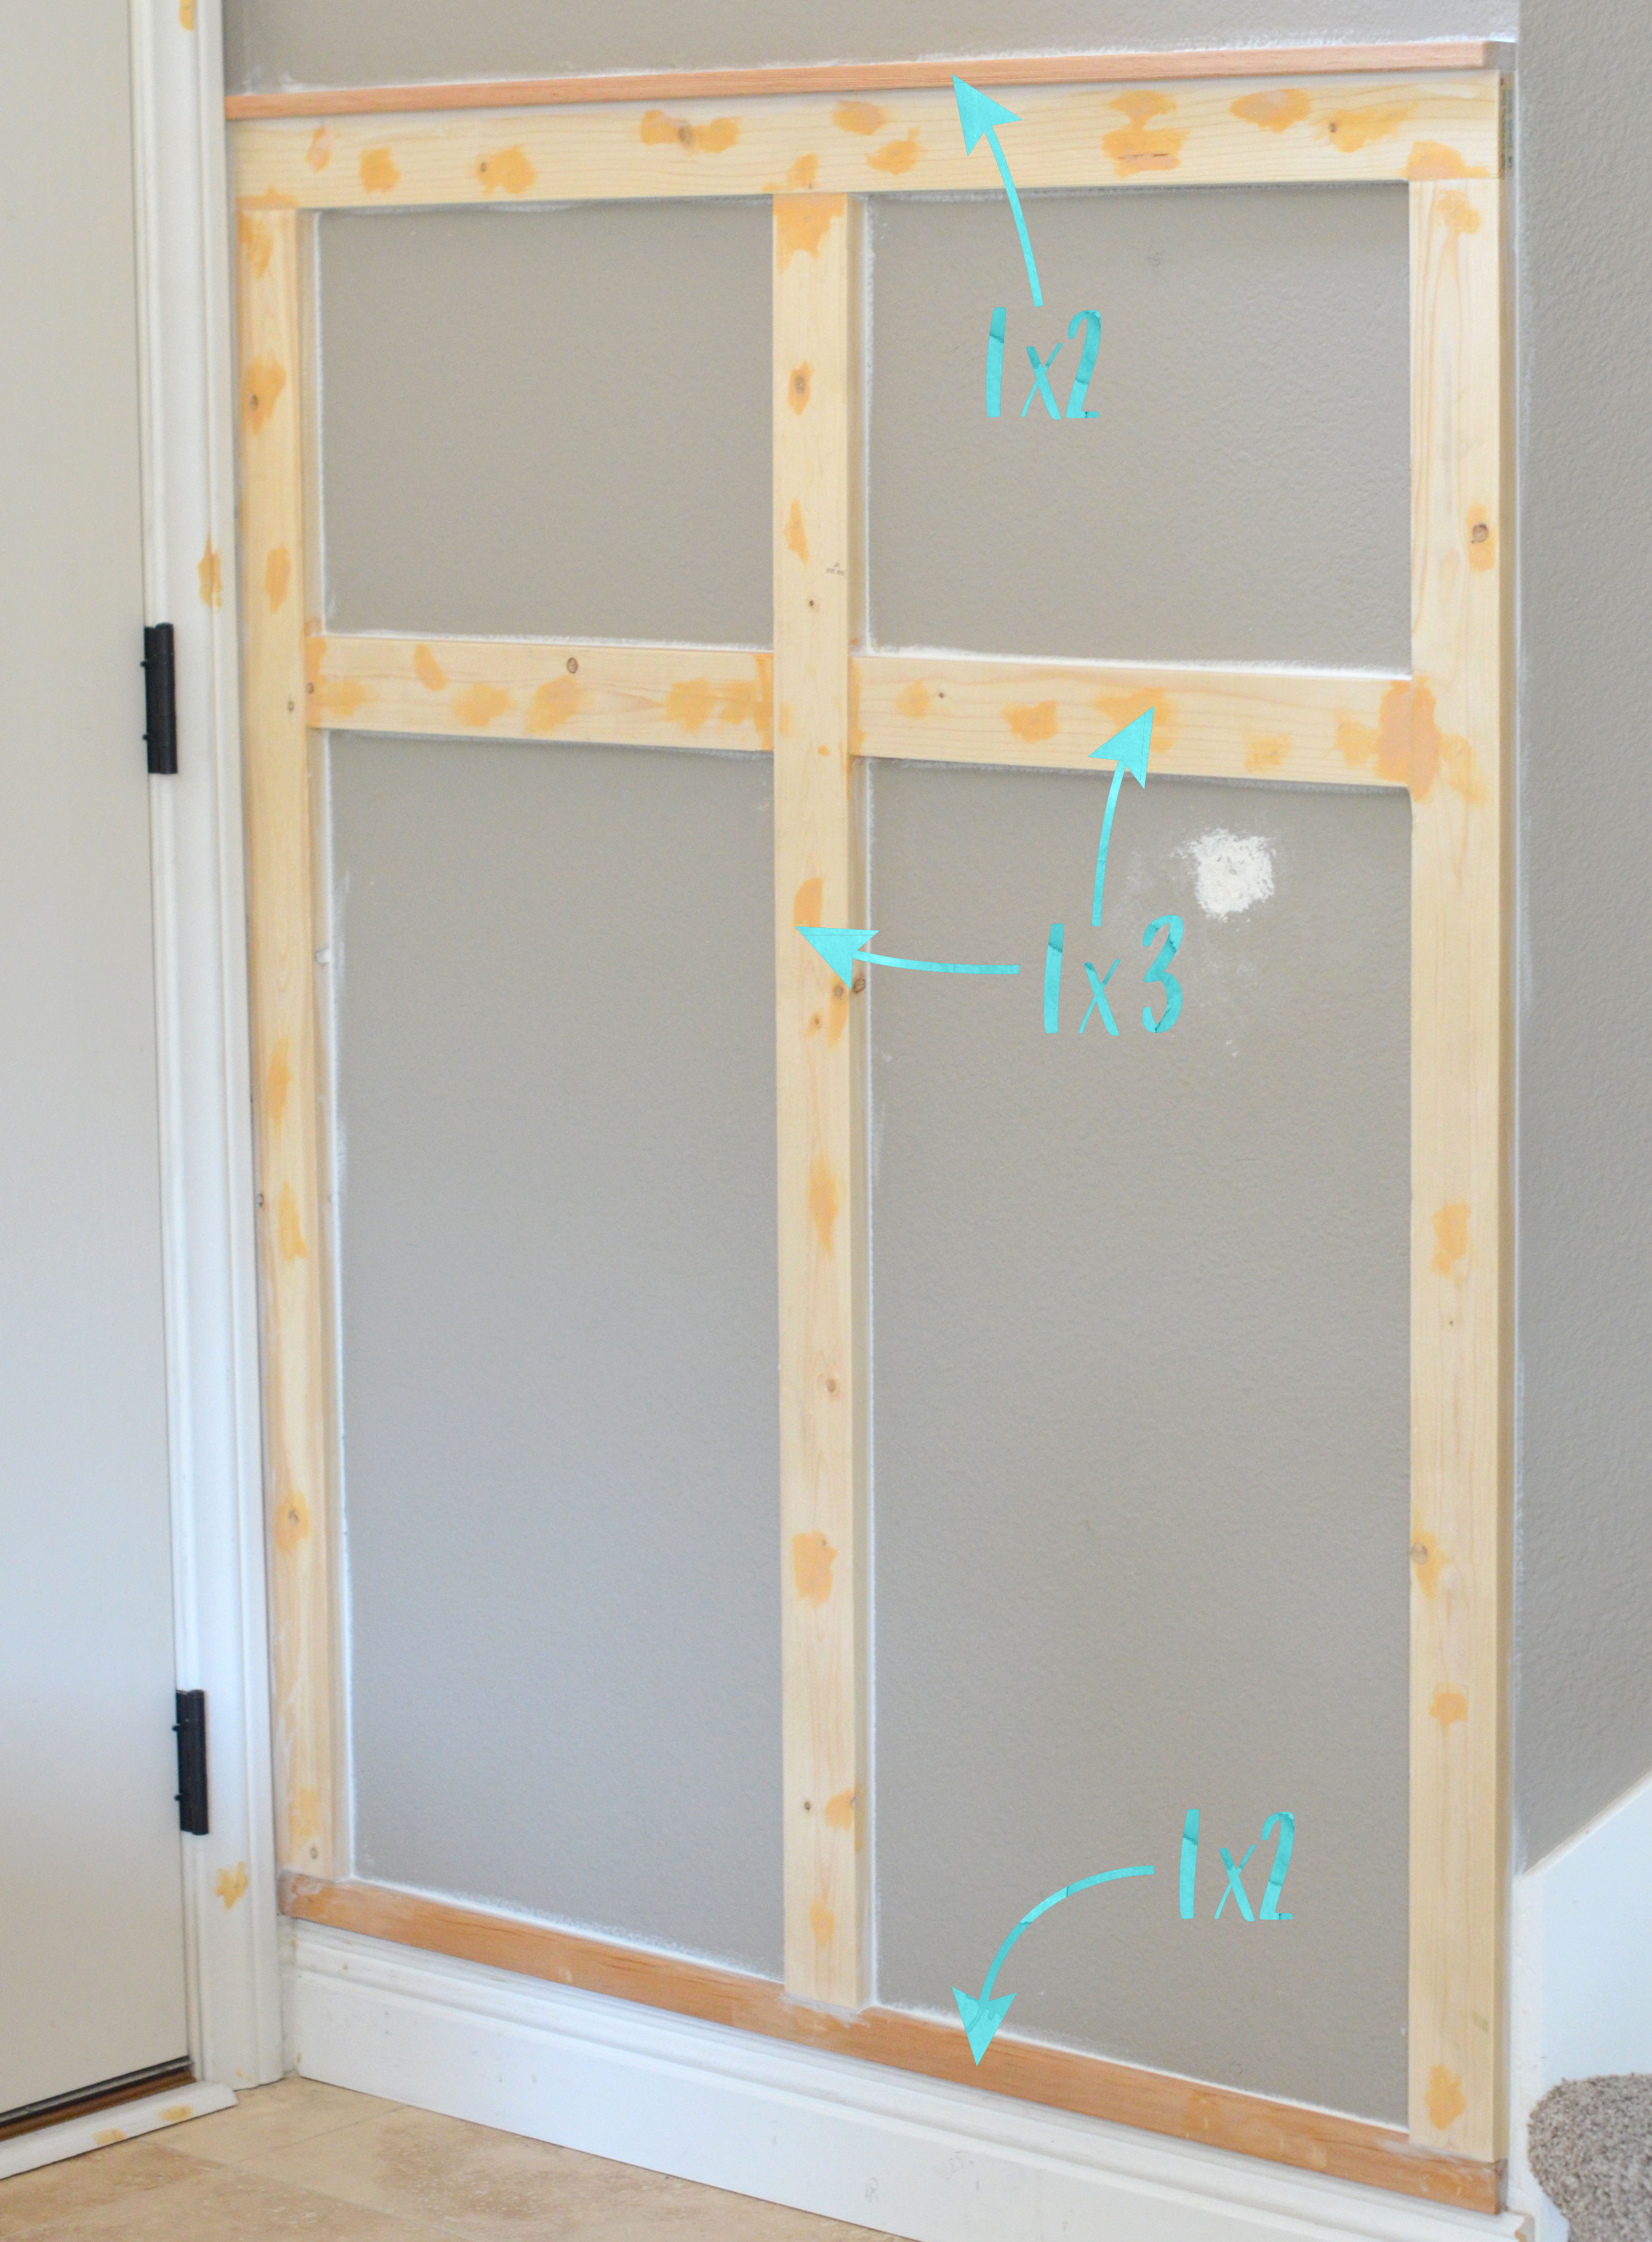
Next, I moved on to the Board & Batten wall. I started off with a 1×2″ on top of the existing baseboard. Then I used 1×3’s to frame out the main area. Finally, I capped the top with a 1×2″.


Step 4

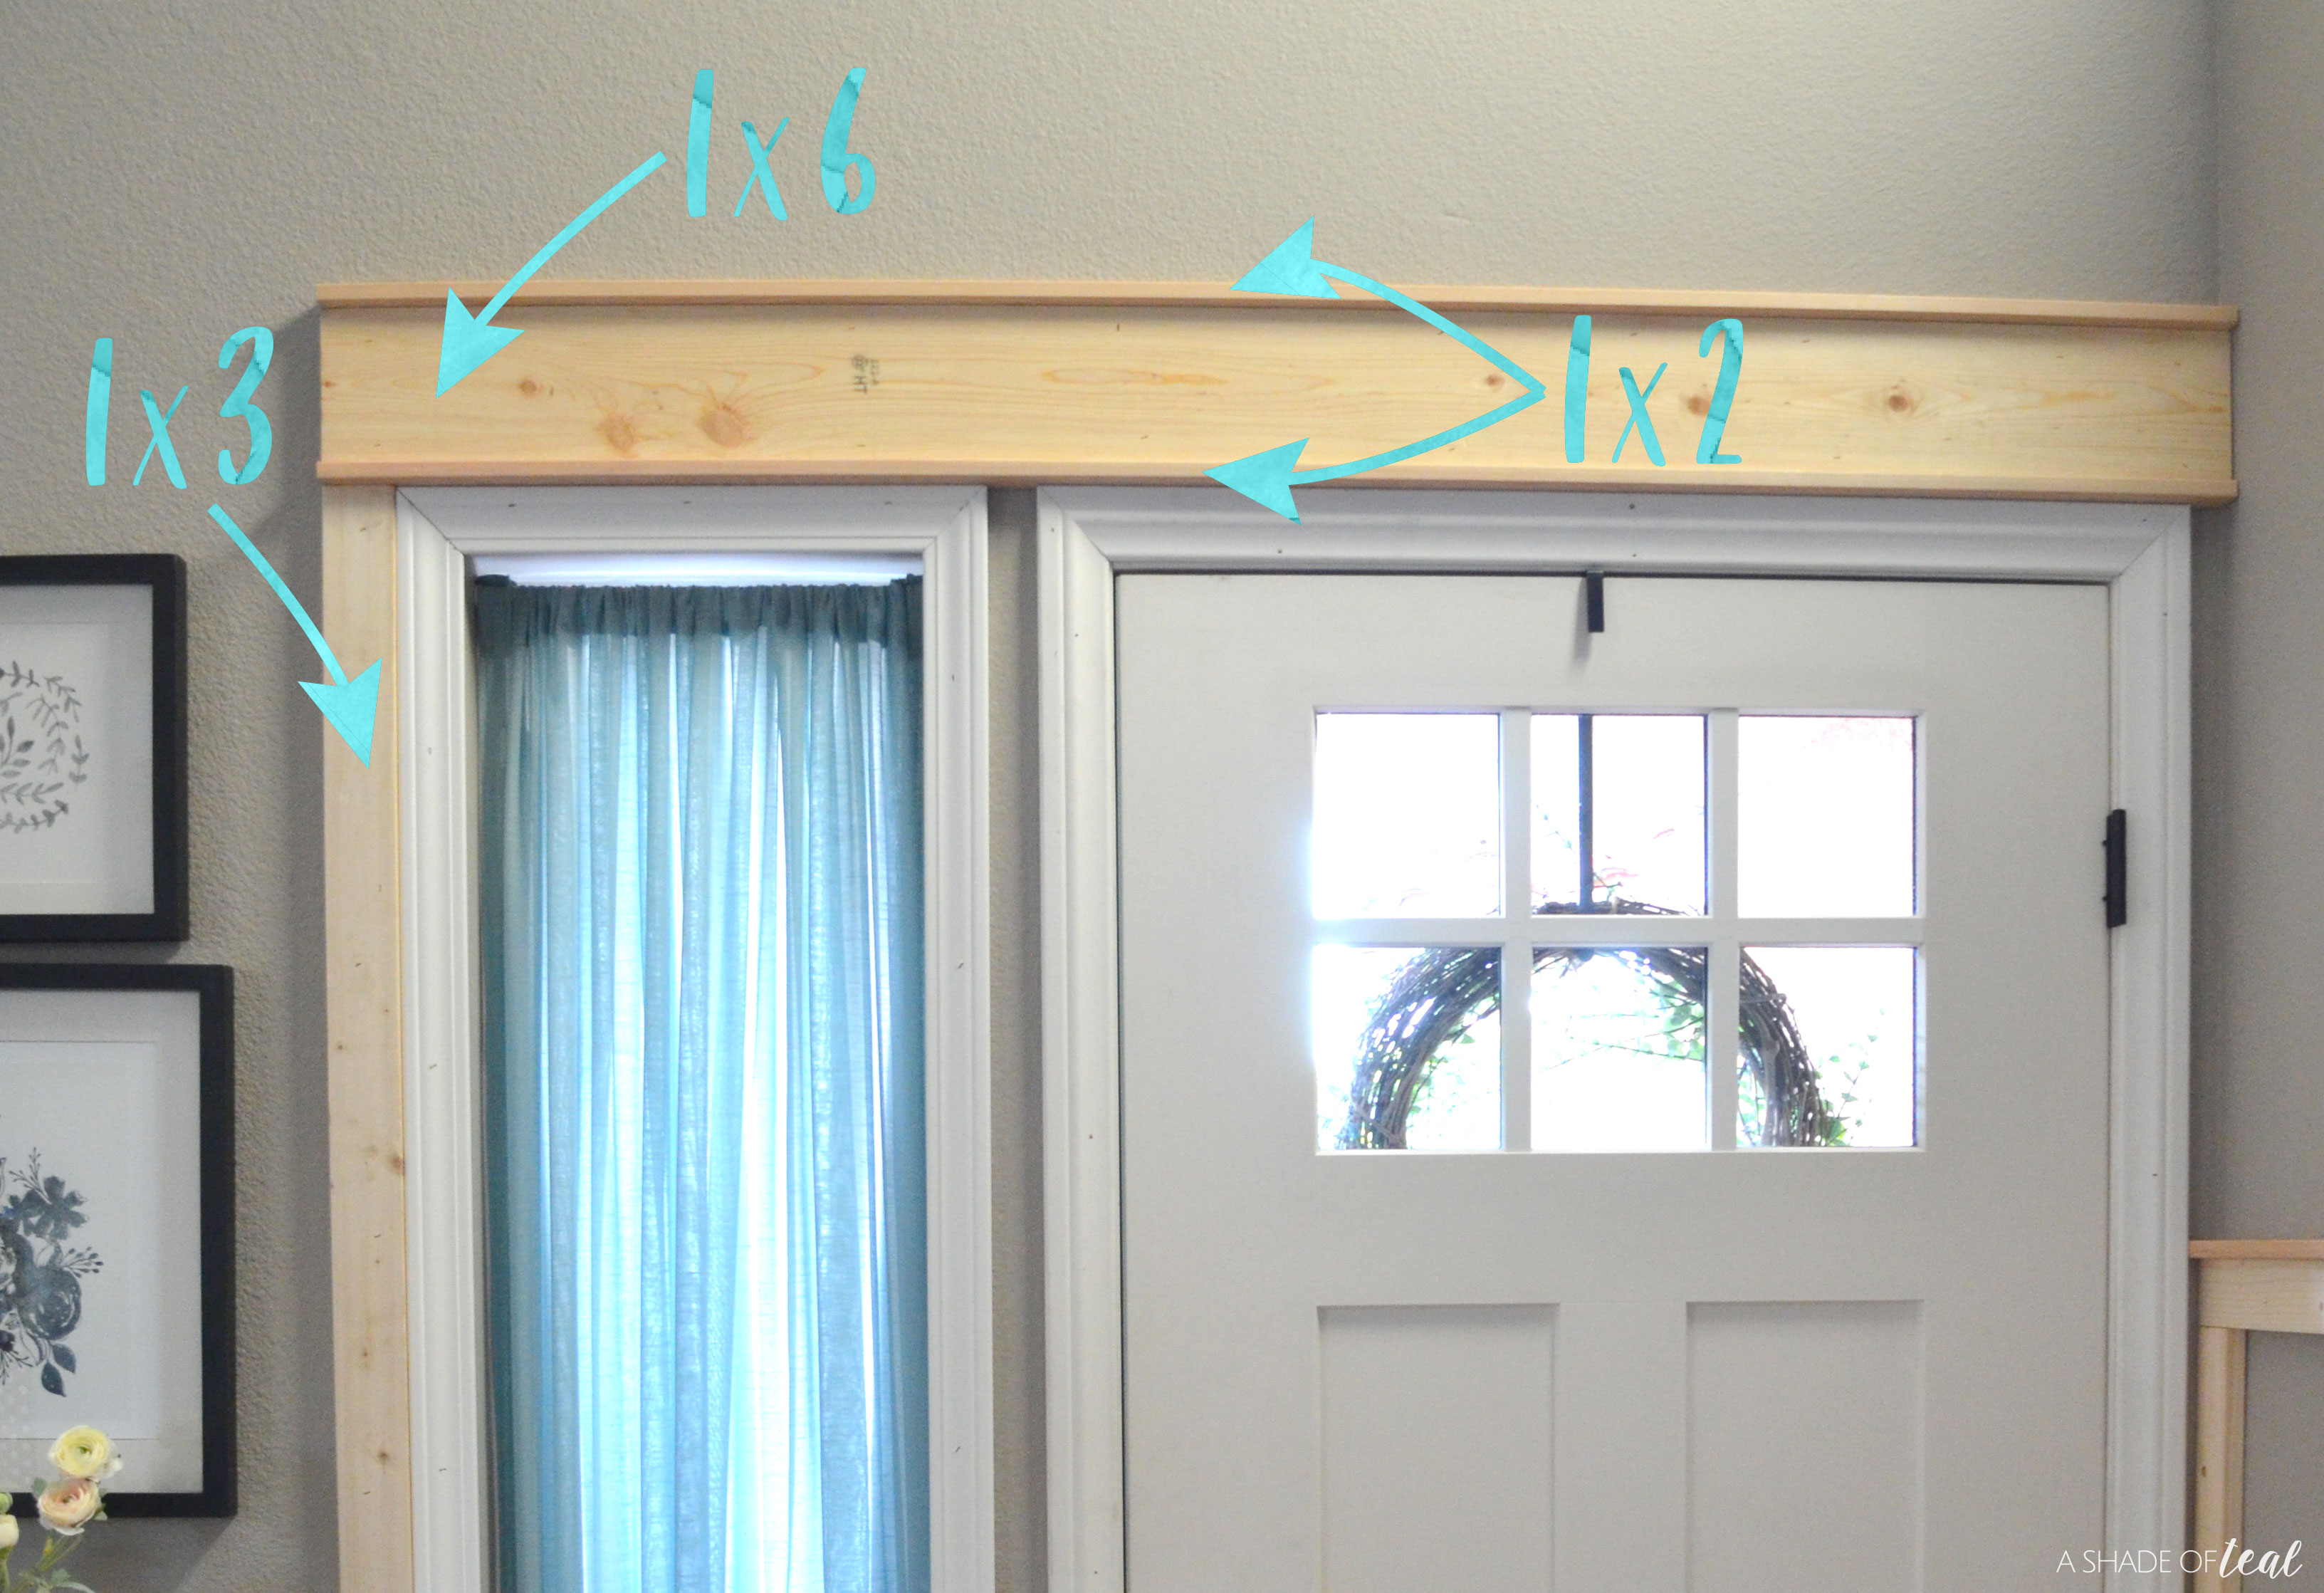
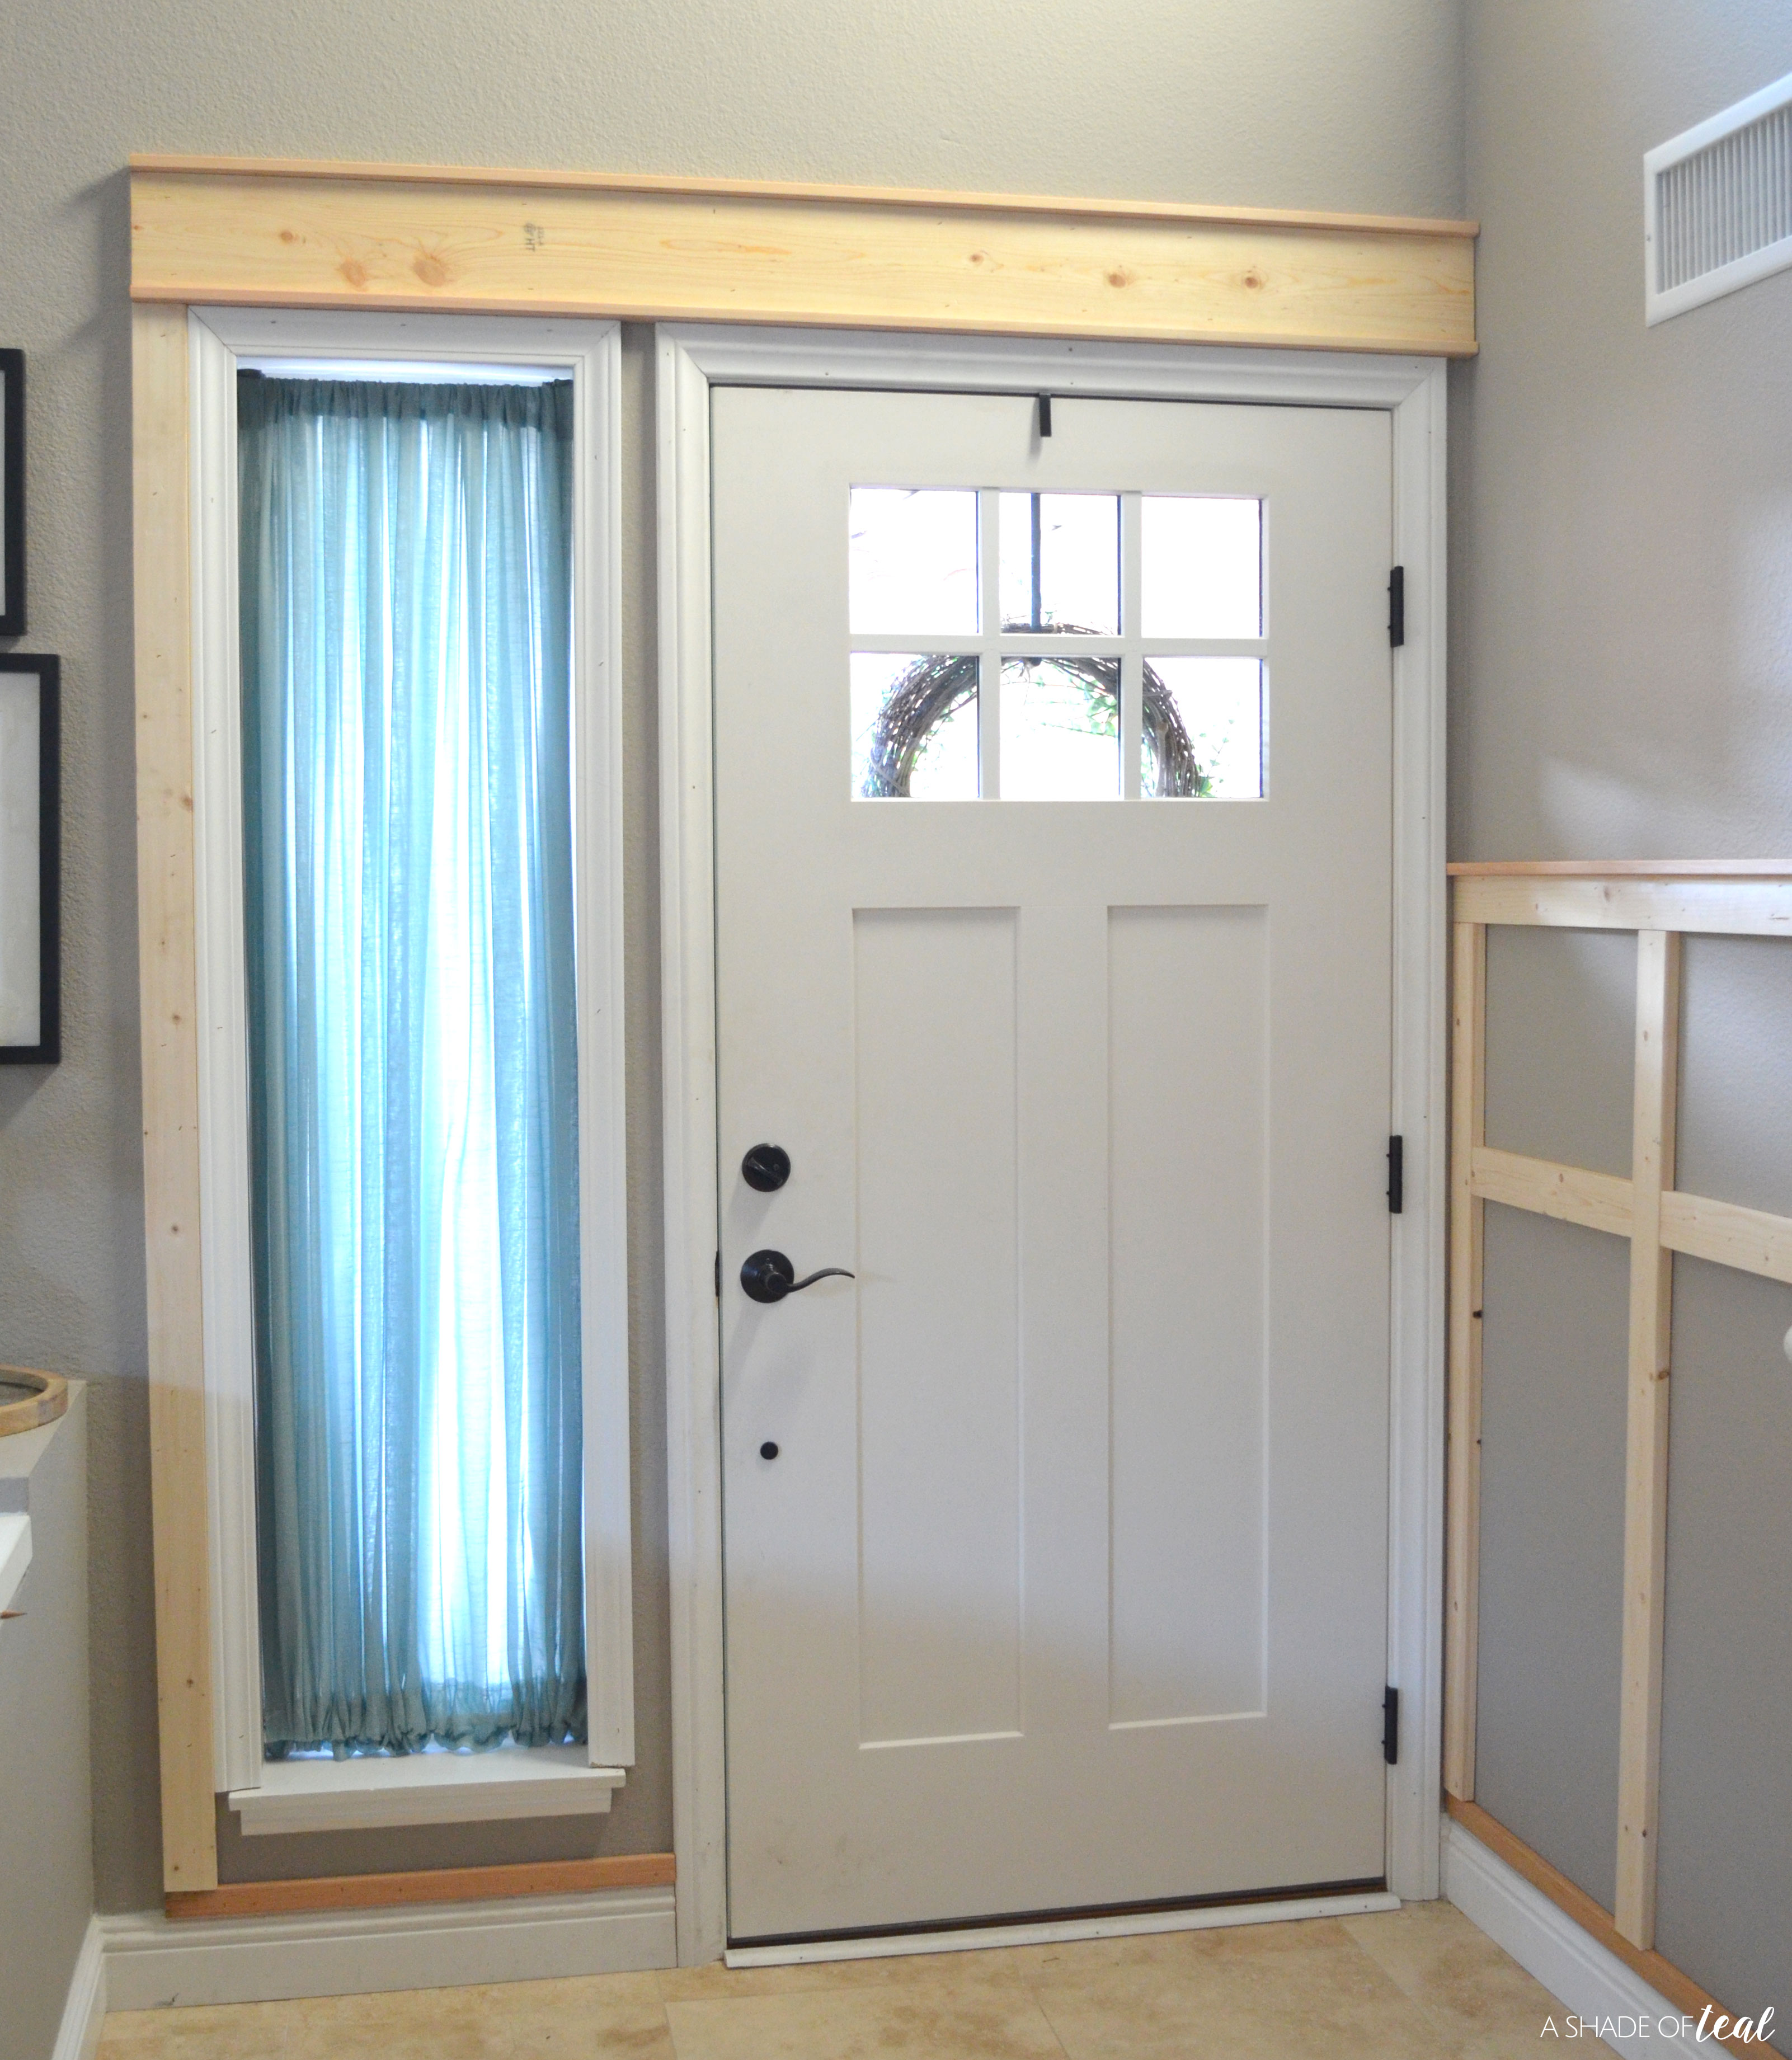
Next, I moved back to the front door. I played around with the header until I figured out what I liked best. Then I added a 1×3″ to the side of the window, followed by a 1×2″ across the entire door, then a 1×6″ and finally capped with another 1×2″.
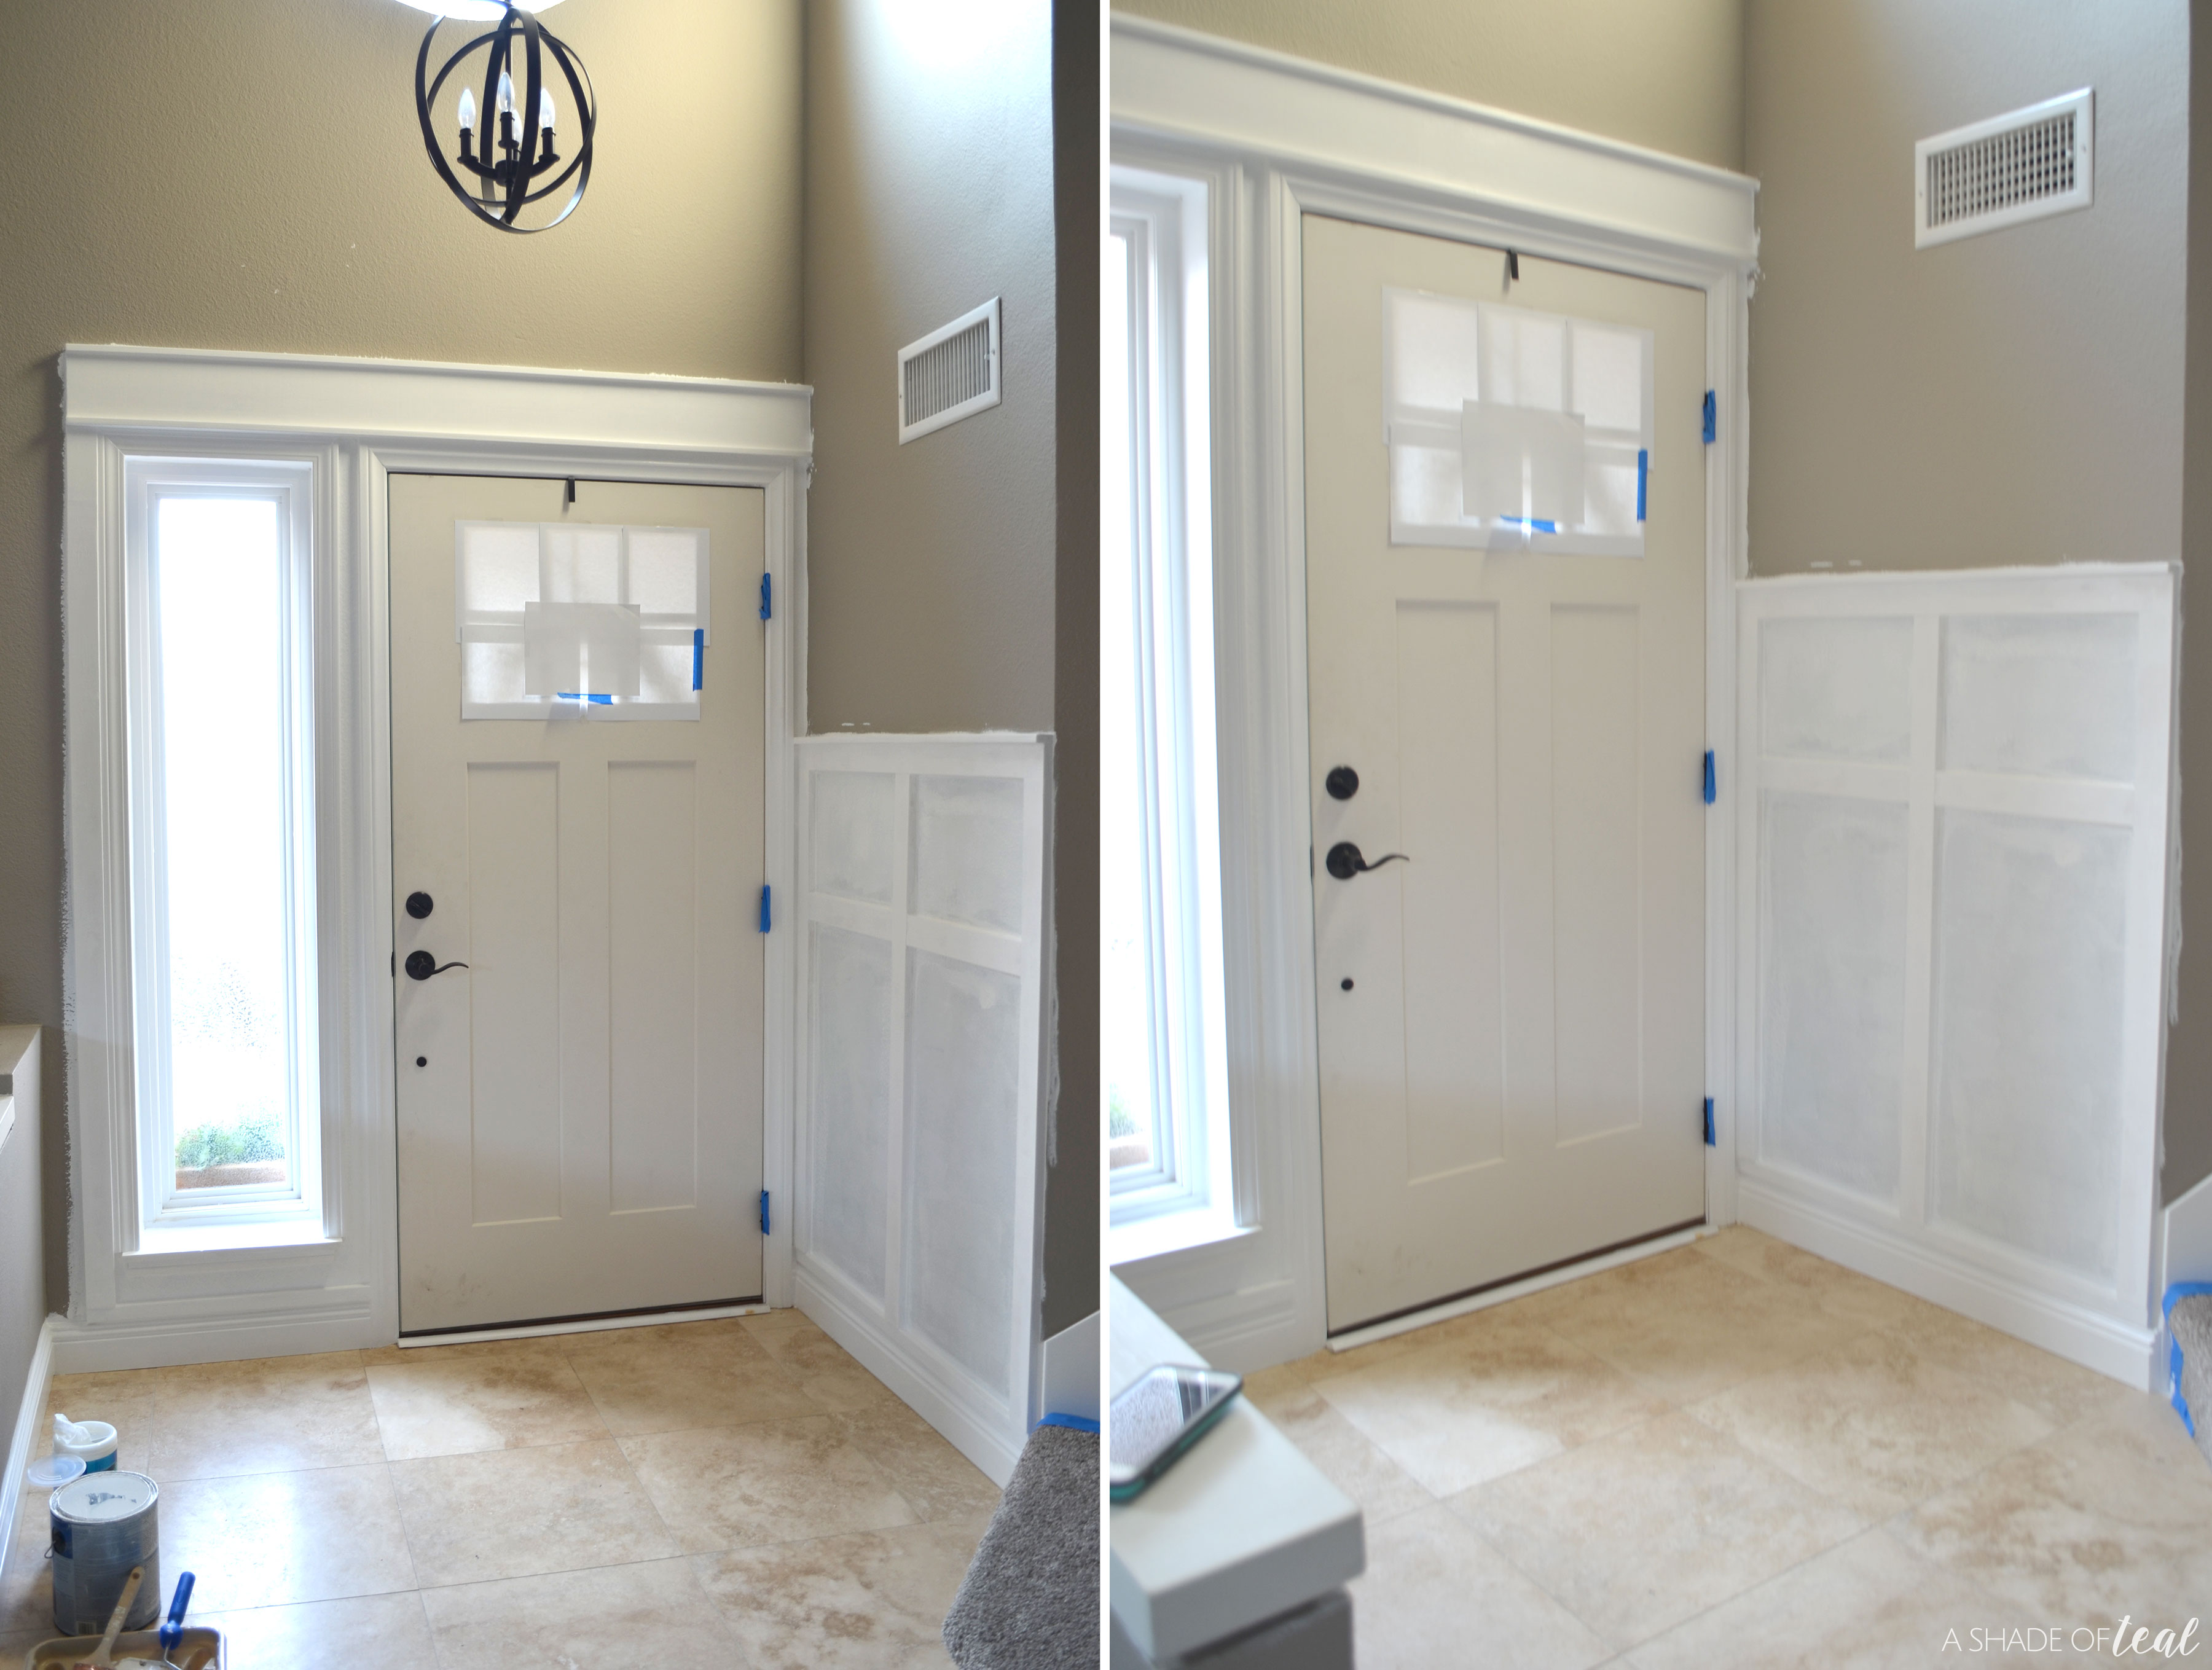
Step 5

Once everything was installed I started prepping for paint. I patched all the nail holes and then caulked in all the seams. I also lightly sanded everything down.

Step 6

Paint! Once everything was dry, I wasted no time and started painting. I used the same semi-gloss paint that is used on all my trim, which is Ultra White by Valspar. I gave all the trim including the board & batten wall 2 coats. My wall paint color is Smoked Oyster also from Valspar.
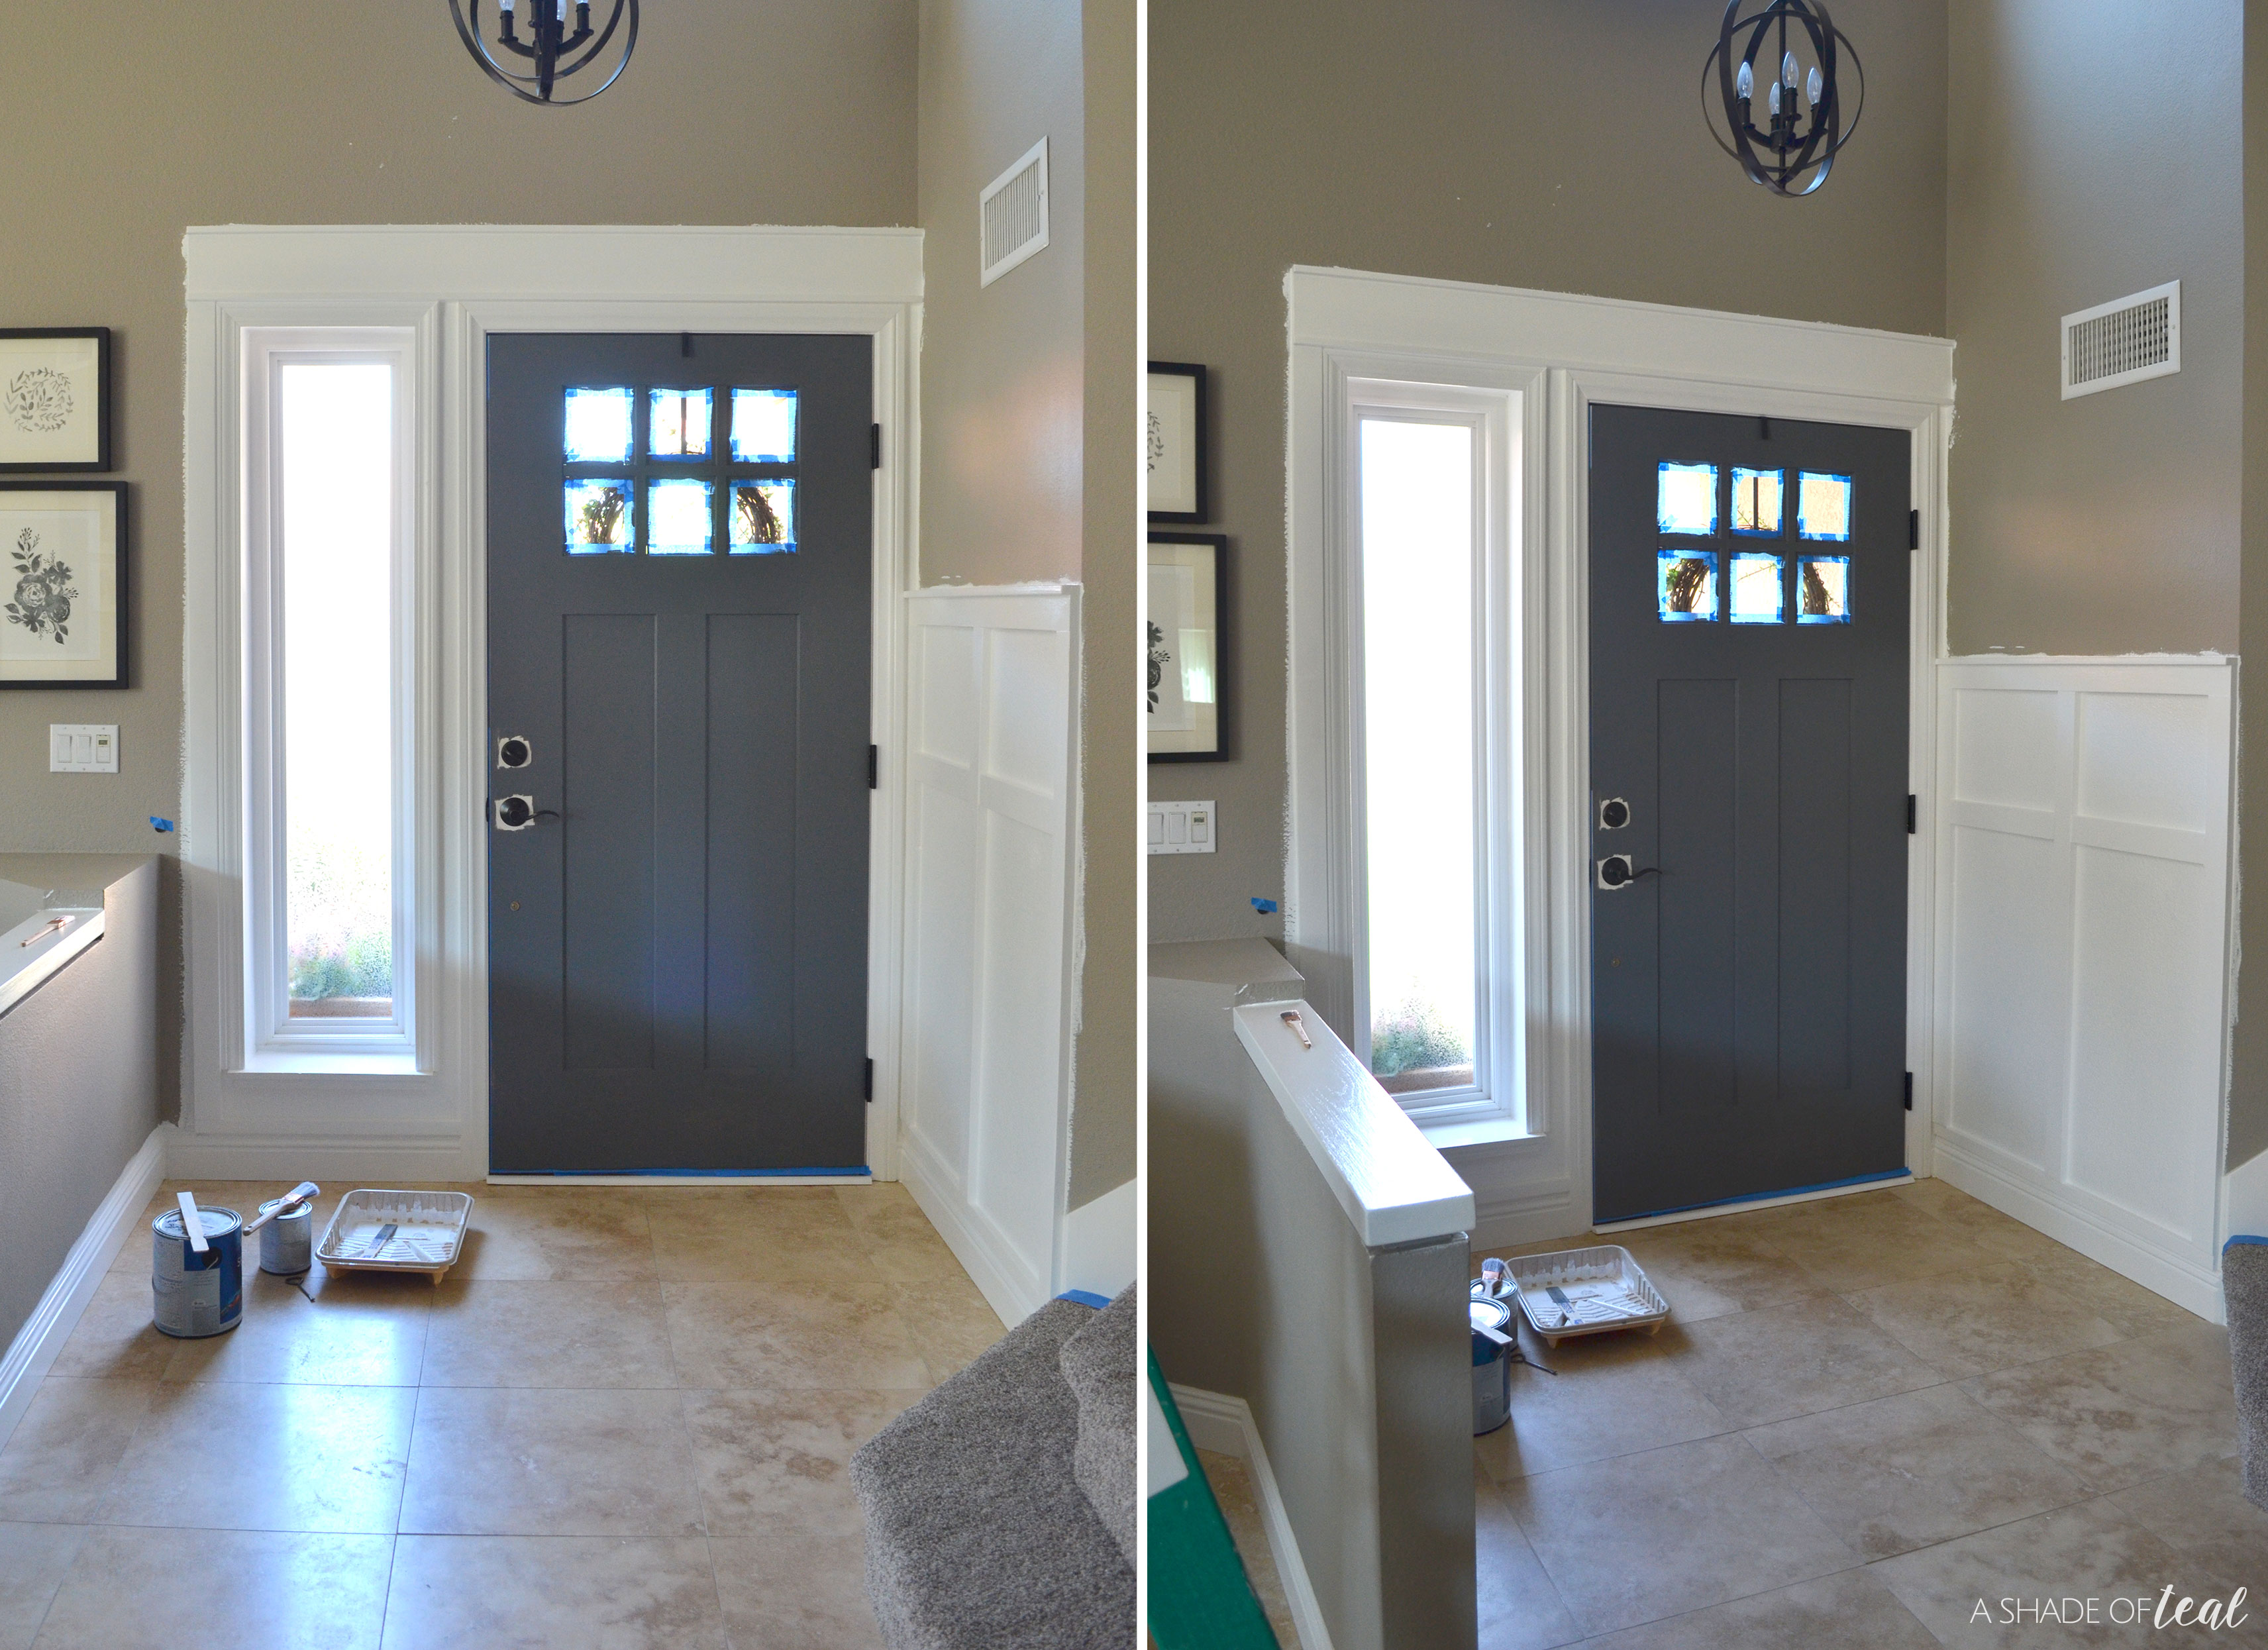
Step 6

Next, I started painting the interior of the front door. For that color I used High-Speed Steel “4005-2B” from Valspar. I also gave it about 2 coats. Then once everything was dried, I went back and touched up my greige wall paint.
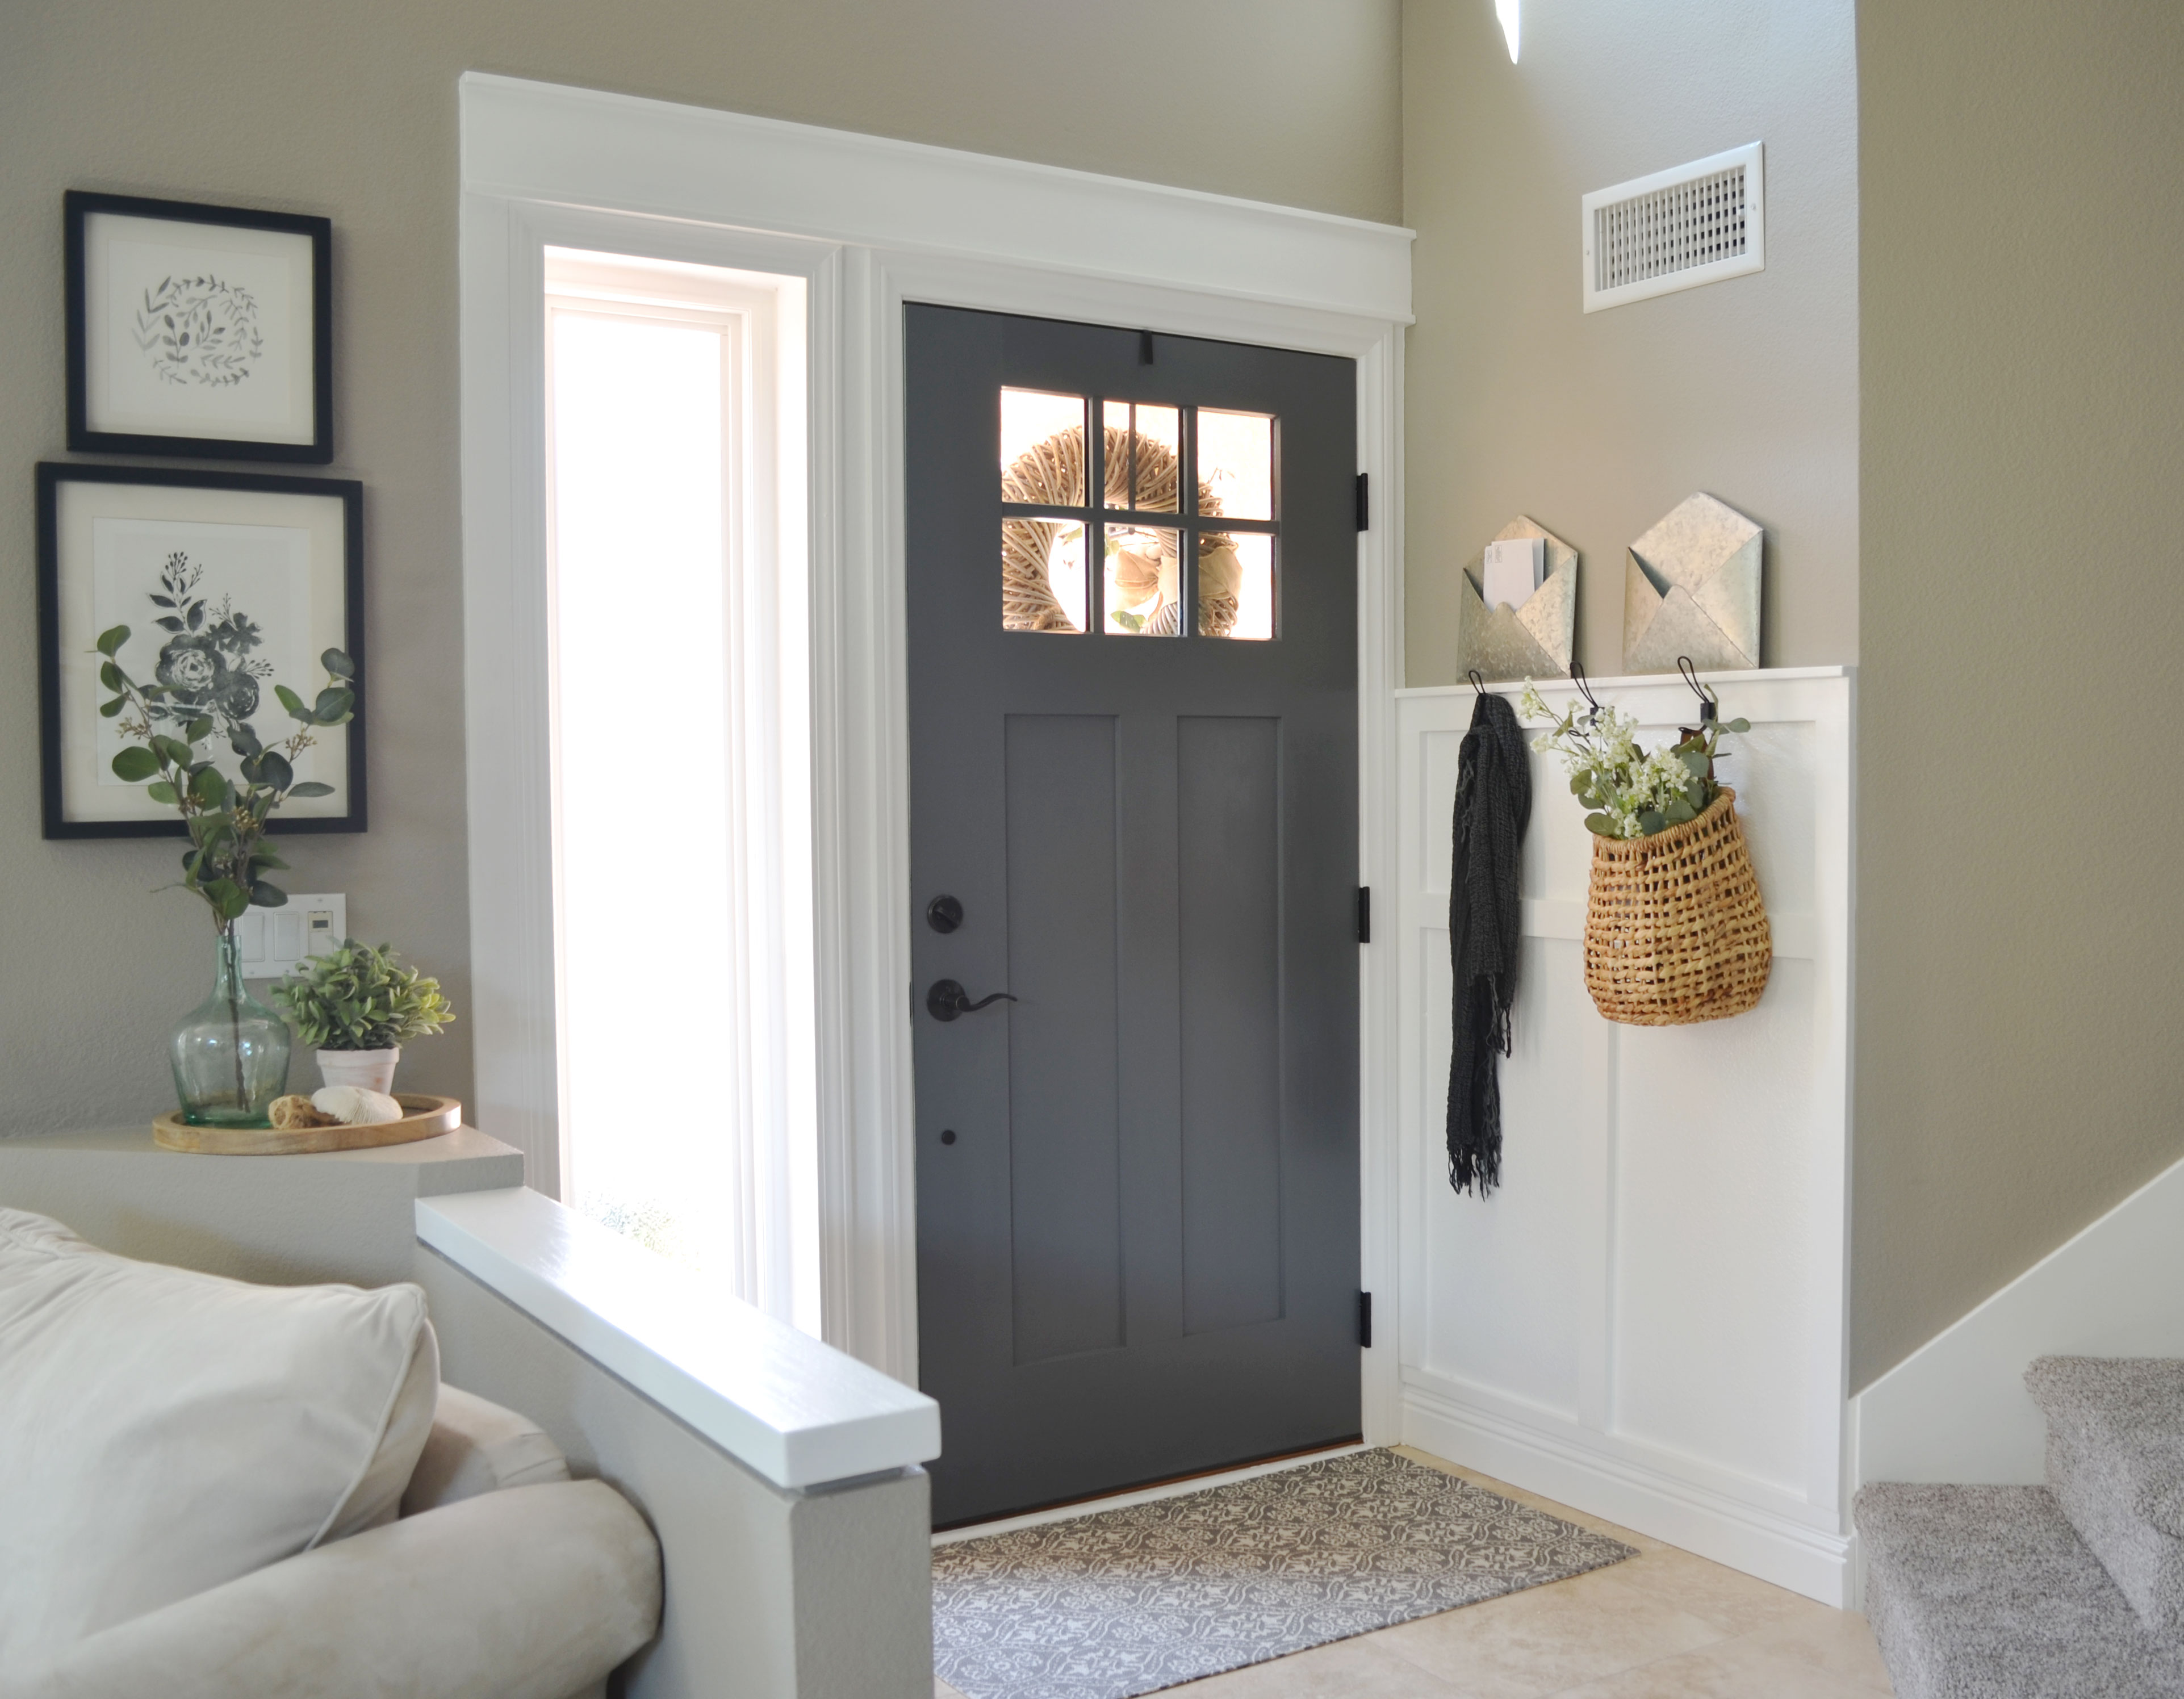
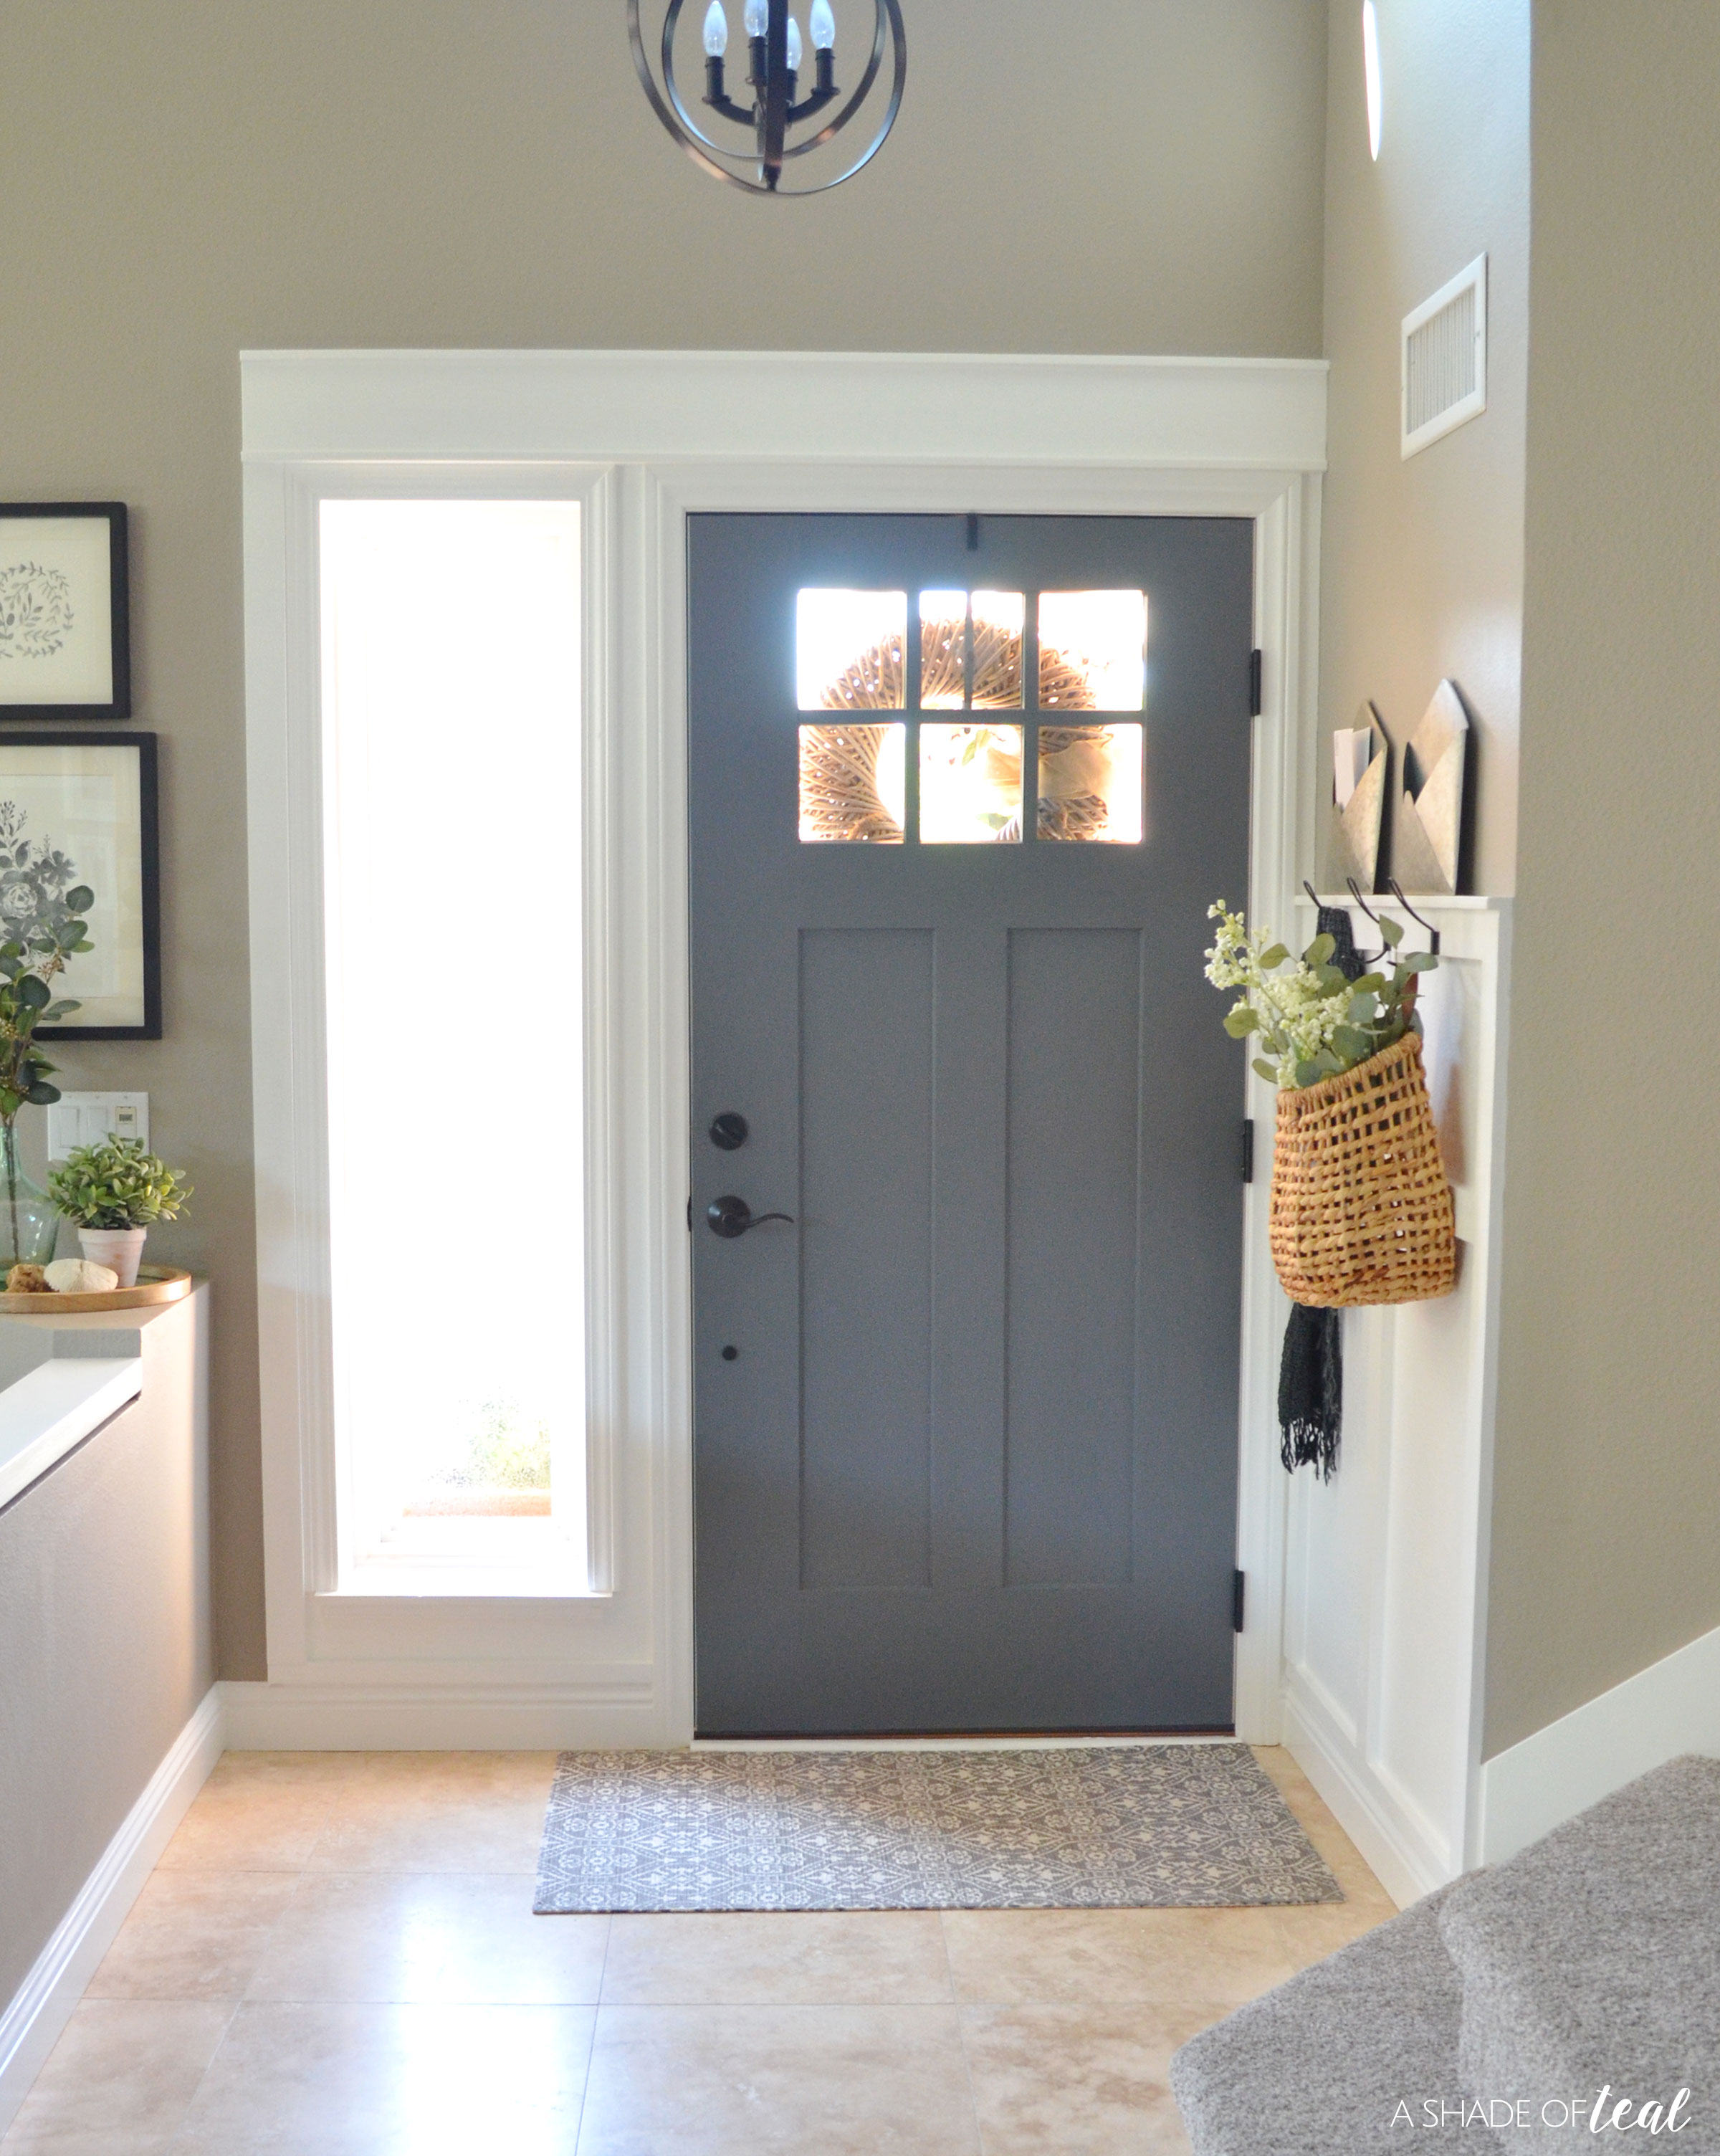
The After!

My entryway may not be the biggest space, but creating an actual entryway has transformed the entire room. Here’s the final reveal!

Shop the look here!

(This post may include affiliate links. If you buy something I receive a small commission of your purchase. Thanks for supporting A Shade of Teal! I only share products I truly love!)

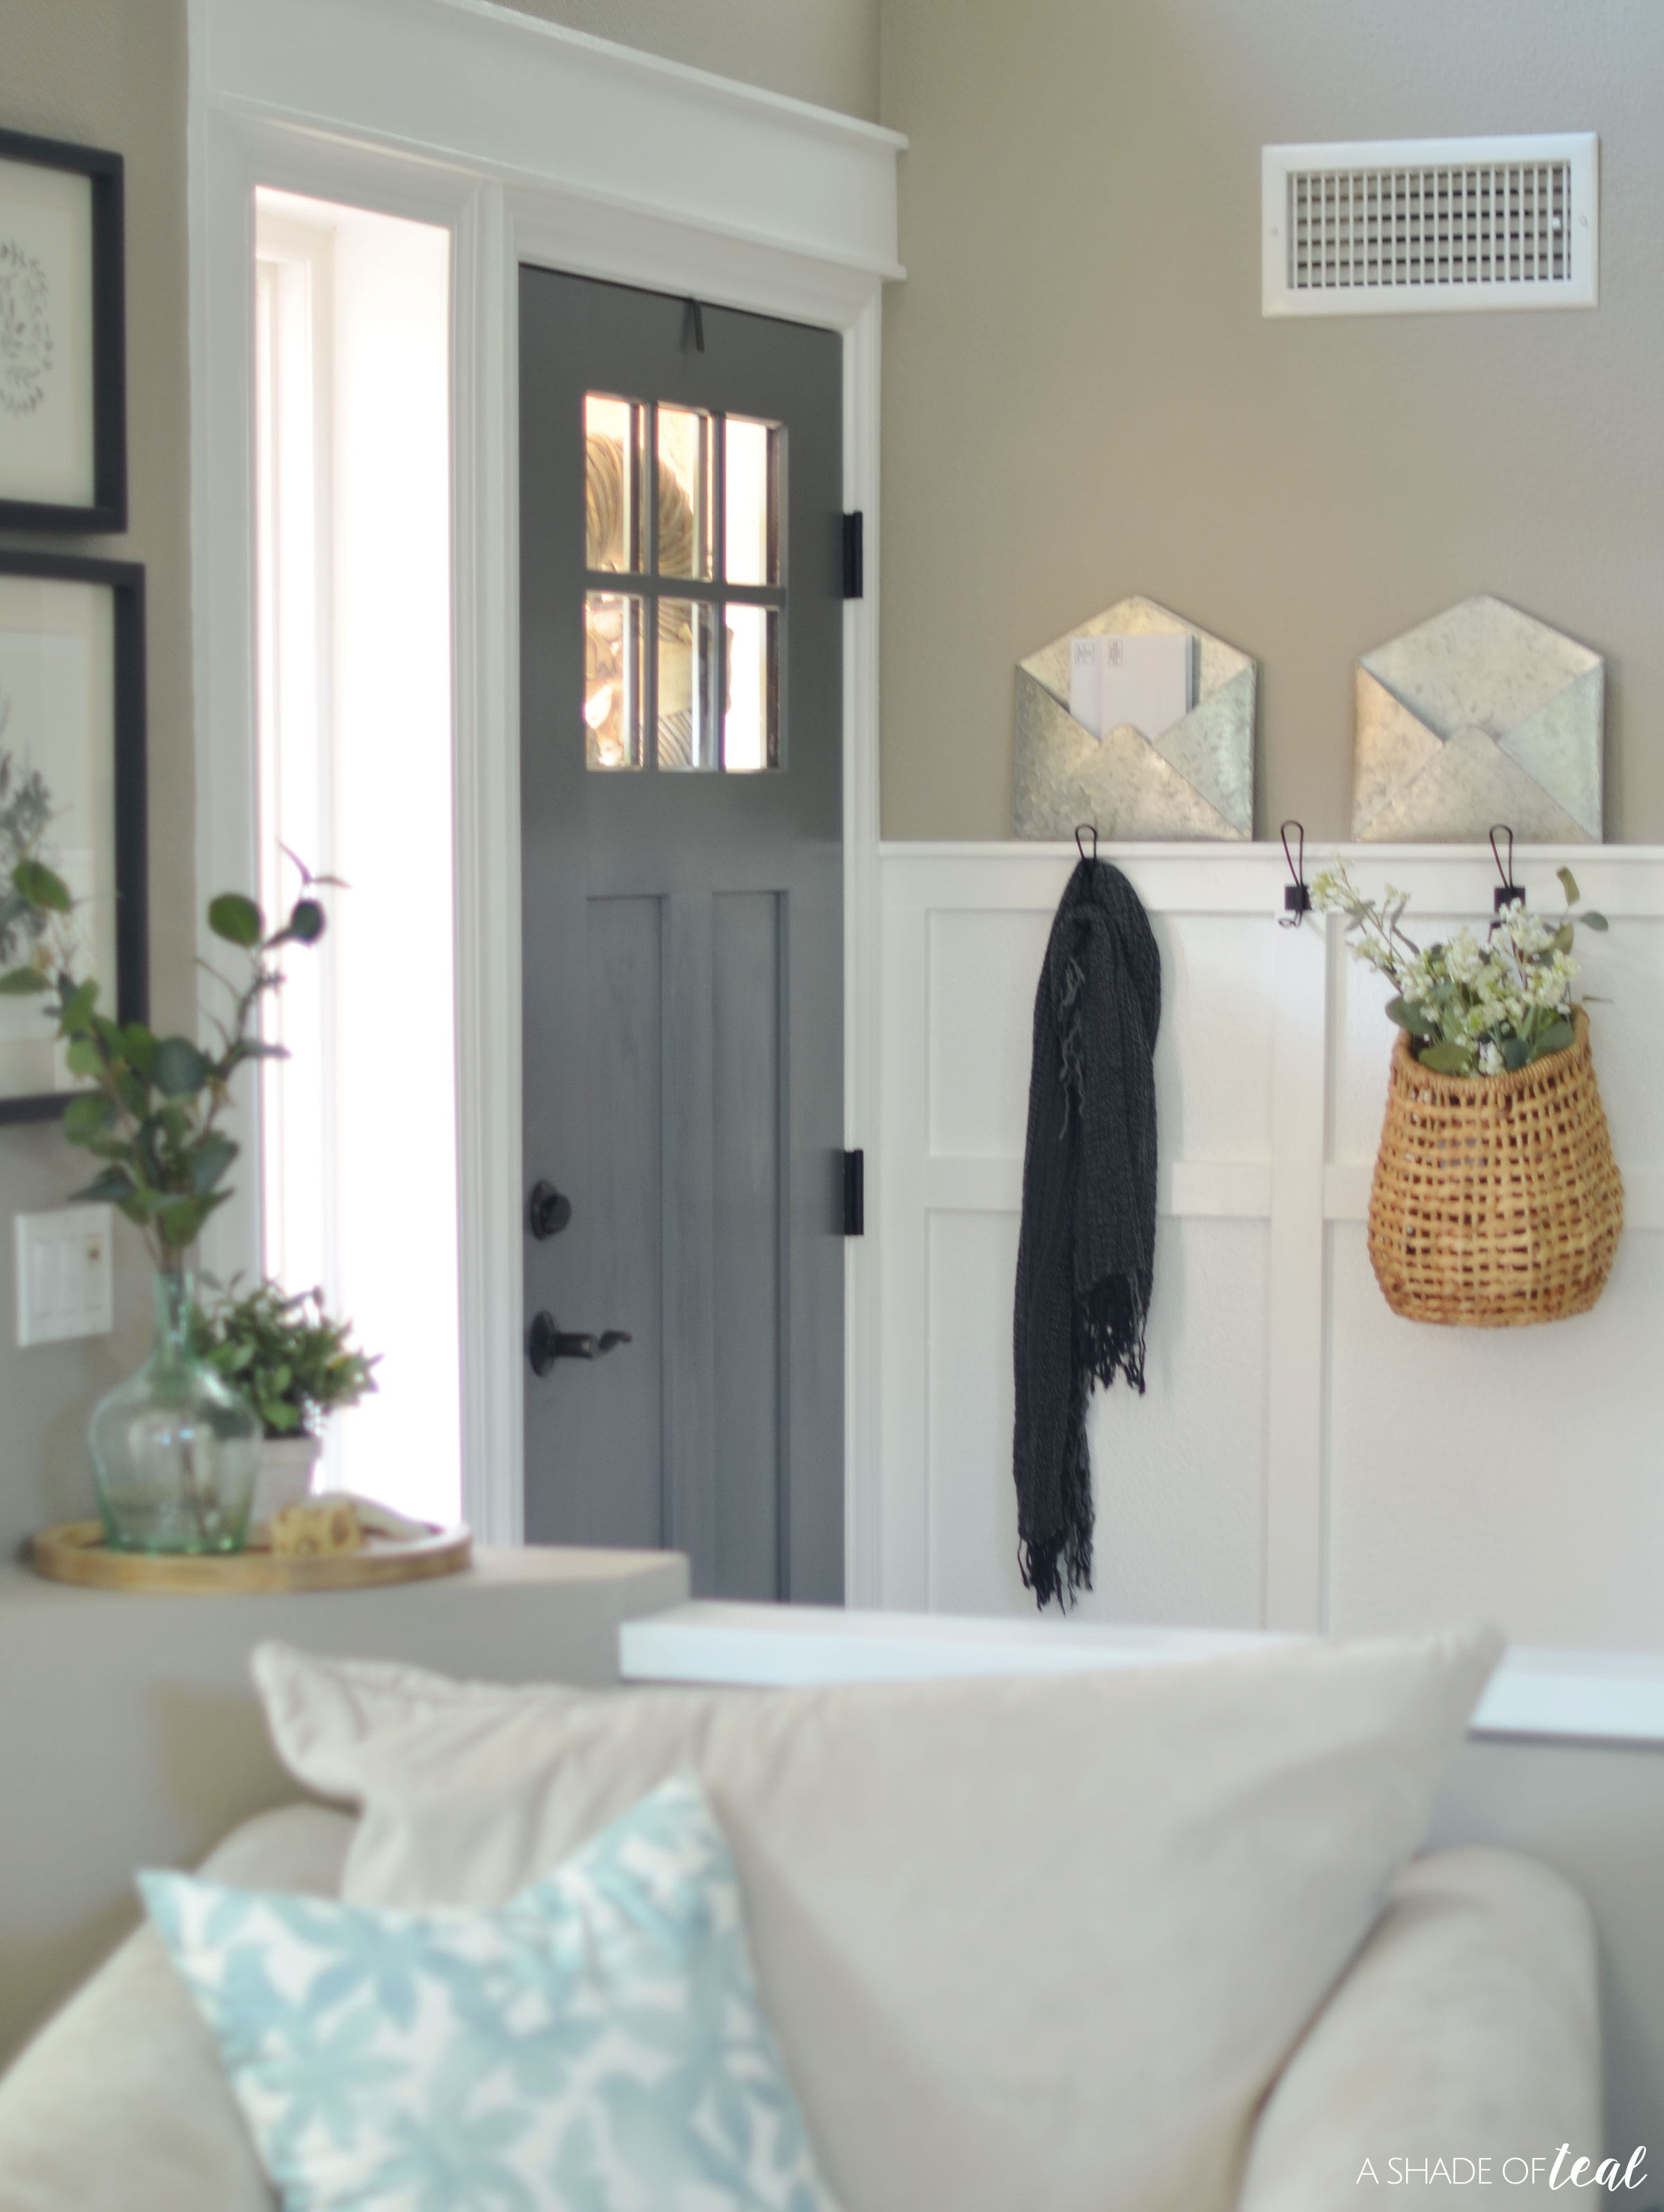
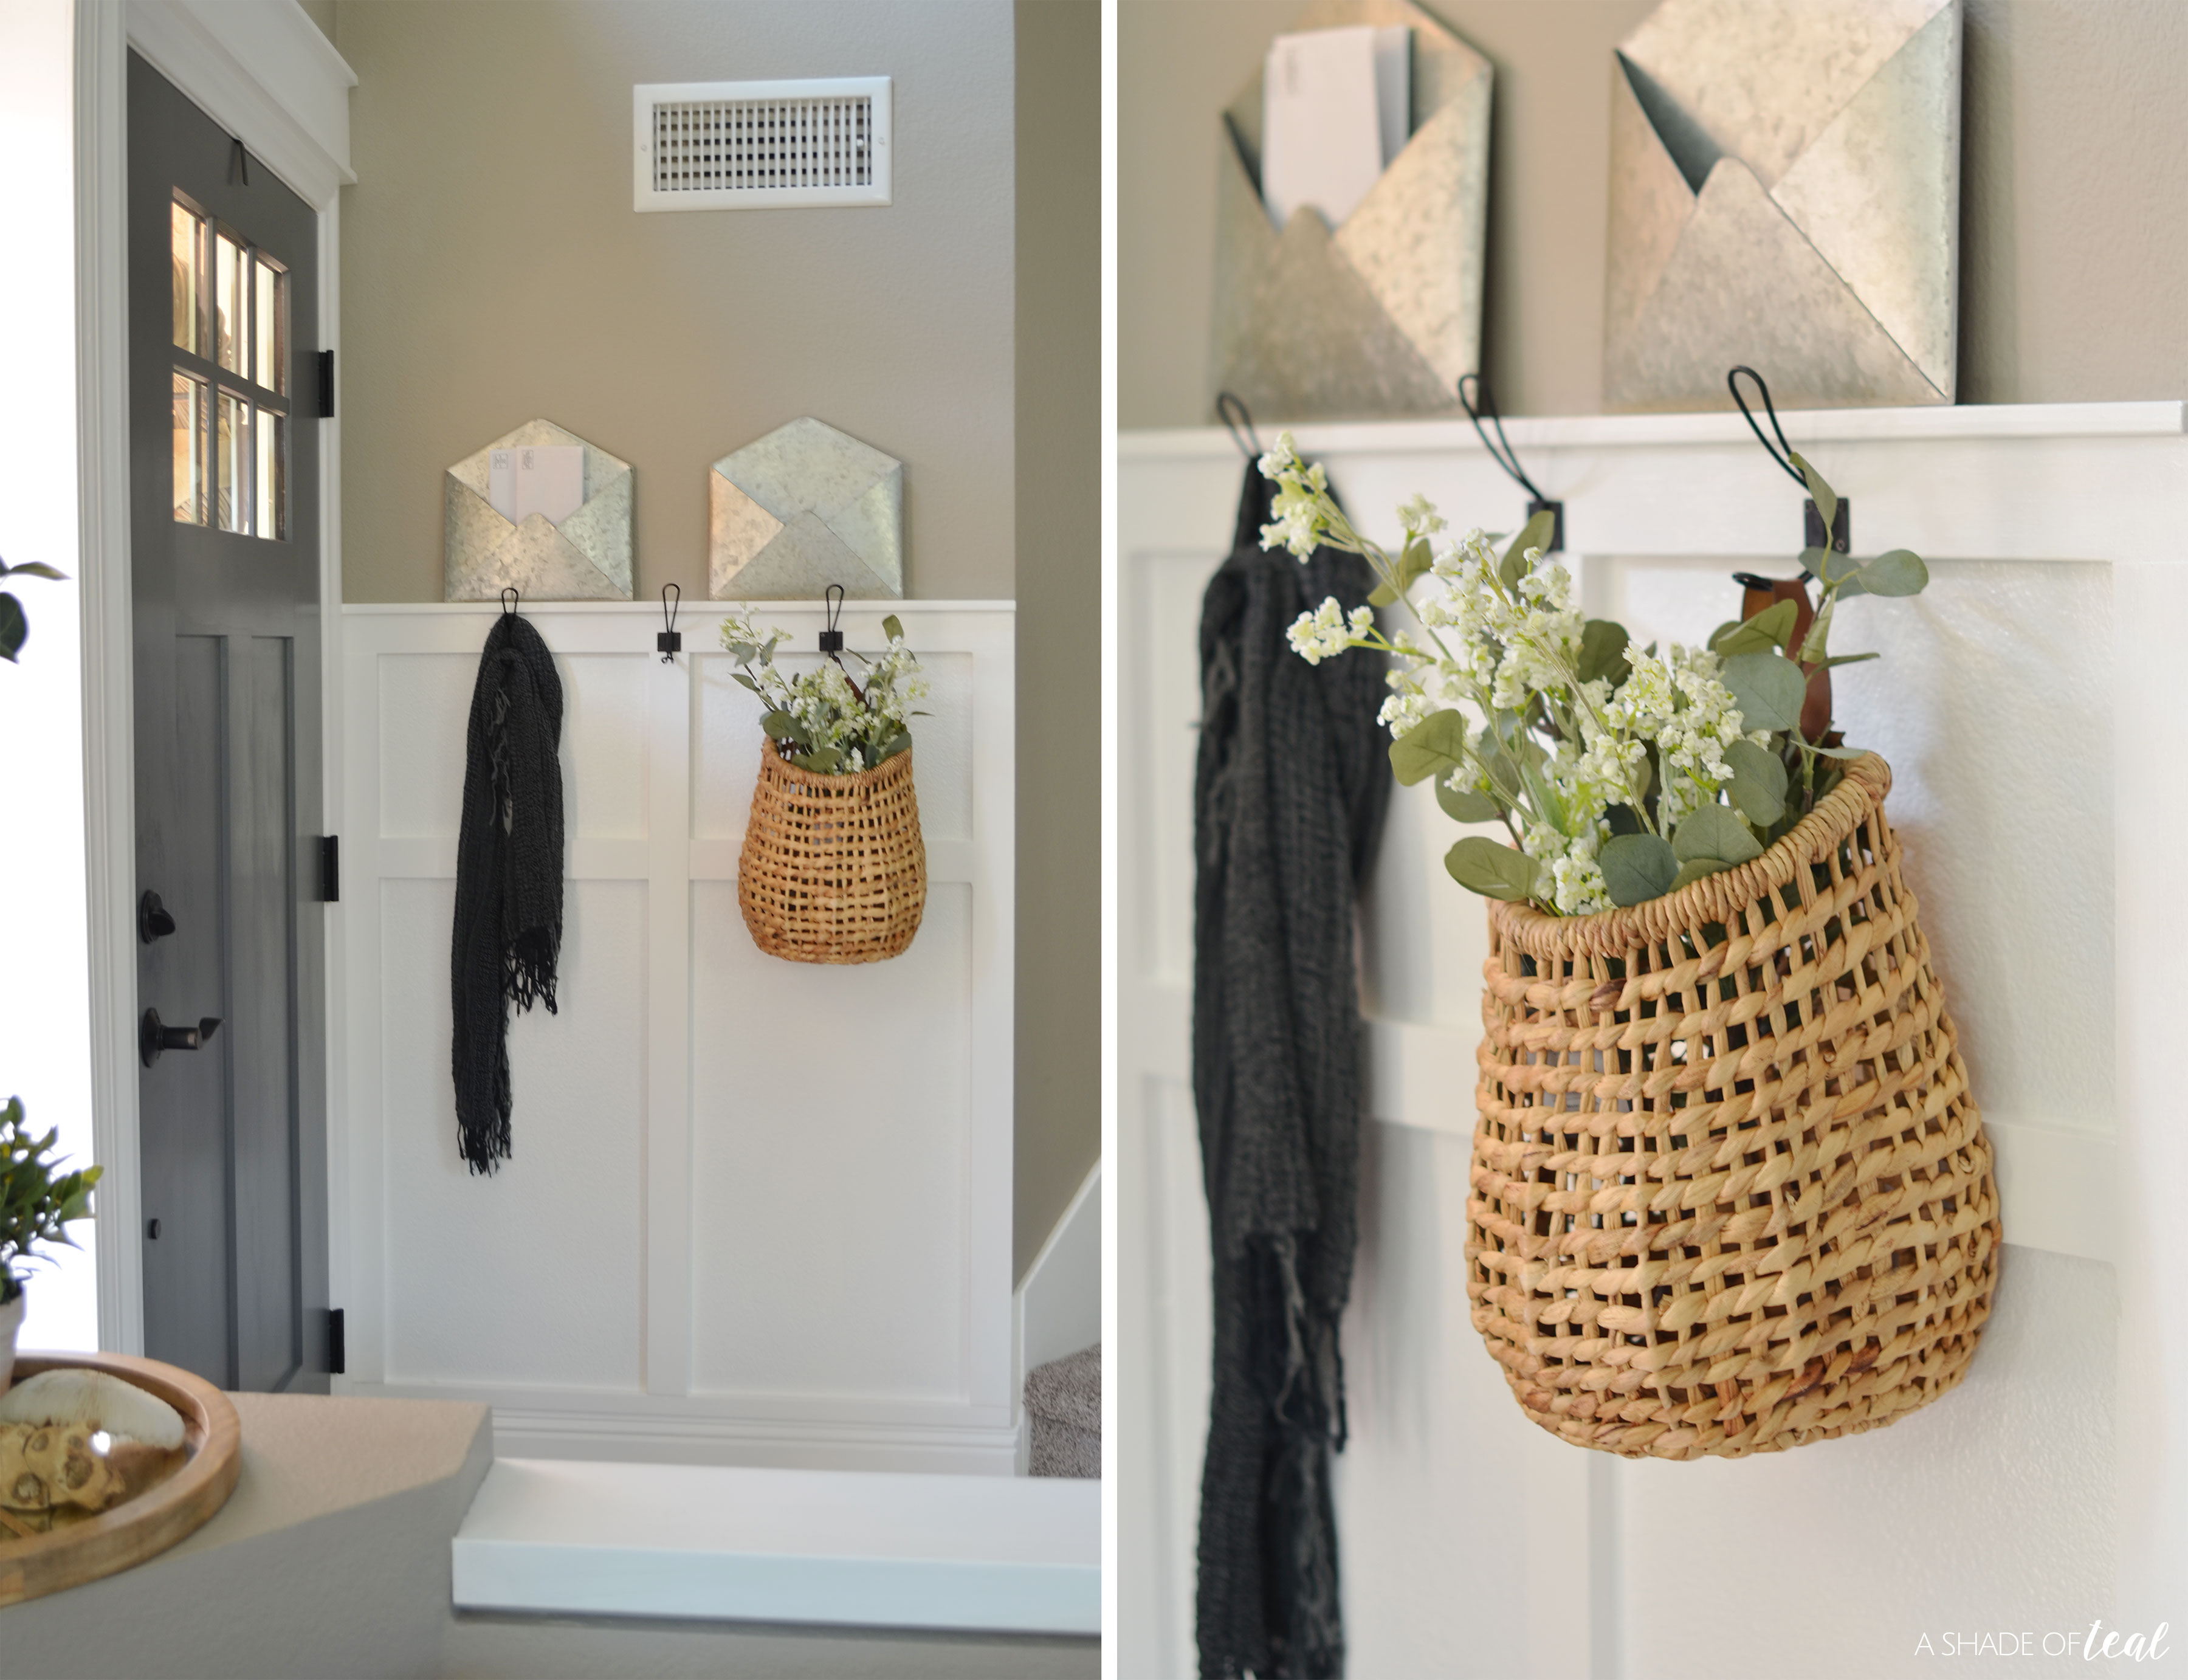
What do you think? It’s crazy how a little trim and paint goes a long way. Not only is the space beautiful, it’s now more functional with storage hooks for coats, backpacks, etc… 

Enjoy!

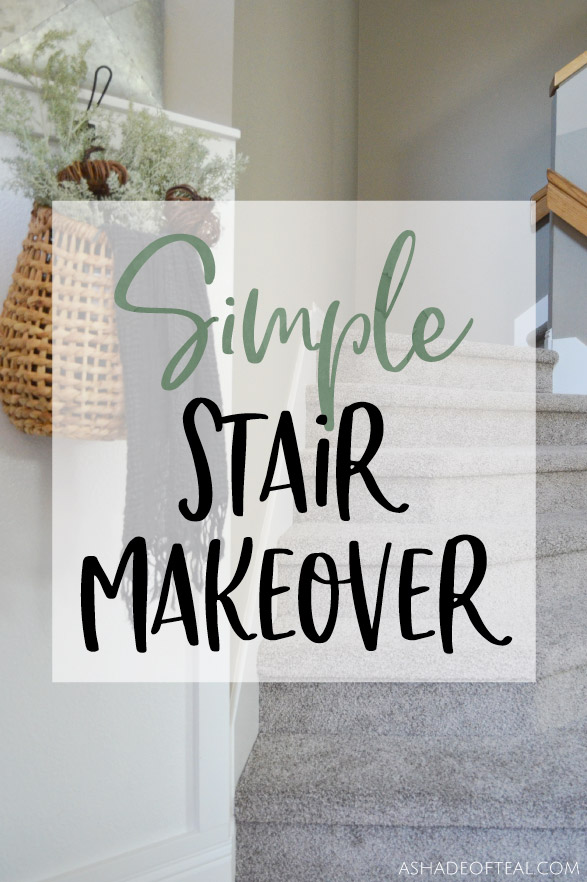
Visit my Stair Makeover here.

Let’s Shop!


4 Comments

About Katy

Hello! I'm a wife, mother to 3 little ones, D.I.Y. enthusiast, and lover of all things creative! A Shade of Teal is my place to share my love of design, home renovation, family life, and of course Teal! Enjoy!

You might also like

DIY- Monogram Art
DIY // Large Wooden Ruler Growth Chart
Easy DIY Shelf for the Nursery Pt2
Rustic Chic Master Bedroom // ORC Week-3: Late Start!
« Coronado Springs: A Disney World Resort Review
Make Any Rug Non-Slip with this Simple Trick »

Comments

  1. Tanya says

    November 12, 2019 at 6:34 am

    How thick were your original baseboards.
    When you put the 1×2 down was there an overhang?

    Reply
  2. Sarah says

    January 12, 2020 at 7:34 pm

    For your entryway, how wide was that front wall where you put the board and batten?

    Reply
  3. Ana says

    November 15, 2022 at 1:14 pm

    What type of/size nails did you use to secure the Board & Batten, particularly for the piece where the hooks were installed?

    Reply
  4. Richland Siding Contractors says

    October 2, 2024 at 4:10 am

    I really enjoyed reading your post about the DIY board and batten project! Your detailed explanation and clear photos make it so accessible for anyone looking to enhance their space. I love how you’ve managed to combine functionality with aesthetics, creating a beautiful feature wall that truly transforms the room.

    Your insights on the tools and materials needed are particularly helpful, especially for those of us who may be new to construction projects. I also appreciate the tips you shared on painting—those really make a difference in achieving a polished look!

    As someone interested in construction, I’m curious—what was the most challenging part of this project for you? Were there any unexpected issues you encountered while building the wall, and how did you overcome them? I’d love to hear your experiences!

    Reply

Leave a Reply to Tanya Cancel reply

Your email address will not be published. Required fields are marked *

Welcome!

I’m Katy- wife, mother to 3 little ones, D.I.Y. enthusiast, and lover of all things creative! A Shade of Teal is my place to share my love of design, home renovation, family life, and of course Teal! Read More…

Looking for Something?

Stay Updated! Get all the latest straight to your inbox!

Archives

If you’re currently looking into new flooring fo If you’re currently looking into new flooring for your home then you may have come across the term “Resilient Flooring.” #AD I’m sure you’re wondering what’s that? Or do I even need it? Well… I’m here to share everything to know about Resilient Flooring, and why you should consider it for your next home update.

Learn everything you need to know about Resilient Flooring and why we choose it for our home. More on the blog today
(Link in Profile) ☝️ or
>>> https://bit.ly/3as6Vjv
•
Or Visit & follow @ResponsibleFloors to learn more!
•
#flooring #homedesign #homeinspo #homereno #ashadeofteal #lifestyleblog #lifestyleblogger #homeideas #diy #diyblogger #interiordesign #homeblogger
#AD 💜 My craft room doesn’t get the best ligh #AD 💜 My craft room doesn’t get the best light, & every time I need to weed detailed Vinyl or Paper I have to move to a different room to get the best lighting. Well, those days are done for me since I have the all NEW @cricut Bright 360!!!

I'm sure you're wondering what is that?!? Well, if you're an avid crafter then you know how important lightning is and Cricut just introduced it's NEW Cricut Bright™ 360, the Ultimate LED Table Lamp!

No more straining your eyes to weed out vinyl, with the Cricut Bright 360 comfortably see every detail. 
💜
Check out everything you need to know on the blog, or Link in profile ☝️
https://bit.ly/3sVlC4P
💜
#cricutmade #ashadeofteal #diyblogger #diyblog #Cricut #Explore3 #Maker3 #ilovecricut #cricutcreations #cricutmachine #gettingcrafty #gettingcreative
#cricutbright360 #bright360
After I left the 9-5 behind and started my own bus After I left the 9-5 behind and started my own business I’ve never stopped looking for ways to help keep me on track with work. #AD Finding time to work while caring for my kids never gets easy, but with the help of some amazing products, I find being organized and motivated that much easier.

With the help of @babbleboxxofficial, @Levenger, @cricut, @gshockwomen,and @twelvesouth, check out my Ultimate list of Office Products that Every SHEBOSS Needs!
•
Check out the product list here:
https://bit.ly/3wMmtHO
or on the blog today (Link in Profile) ☝️
& Swipe right to see more.
•
#SheBossBBxx #Levenger #penlife #penaddicts #greatgiftidea #cricut #cricutmade #gshockwomen #GMAS2100 #TwelveSouth #HoverBarDuo
Another Holiday Gift Guide and this time it’s al Another Holiday Gift Guide and this time it’s all about our pups! #AD If you’re looking for more gift ideas for your pets that isn’t the typical toy, treat, or new bed, then I have the perfect solution for you, @DoggieDailies 🐾

Doggie Dailies offer everything from Advanced Calming Chews, Skin & Coat Soft Chews, to Digestive Support Bone Broth Boost. 🐾
•
Learn more with my Holiday Pet Gift Guide with Doggie Dailies!
here: https://bit.ly/3IwVfZc
or on the blog today (Link in Profile) ☝️
•
#DoggieDailies @babbleboxxofficial
Follow on Instagram
This error message is only visible to WordPress admins
There has been a problem with your Instagram Feed.

Sharing Permissions

This blog, including all text, images, and other content, is the property of A Shade of Teal (unless otherwise noted). Use of entire posts; whether verbatim or paraphrased, is not acceptable. Photographs may not be altered or edited, including watermarks. Please contact for permission to use photos, including but not limited to images, text, or other content on this site.

You might also like

What’s Resilient Flooring? Plus, Why We Choose It.

What’s Resilient Flooring? Plus, Why We Choose It.

Cricut Bright 360: Everything you need to know!

Cricut Bright 360: Everything you need to know!

The Ultimate Office Products that Every SHEBOSS Needs!

The Ultimate Office Products that Every SHEBOSS Needs!

New Year, New Storage Around the Home

New Year, New Storage Around the Home

Valentine’s Day Decor & Gifts

Valentine’s Day Decor & Gifts

Copyright © 2012-2025 · A Shade Of Teal · Divine theme, Logo and Theme Customization By A Shade Of Teal Design

This site uses cookies & by continuing to browse this site, you're agreeing to our use of cookies. Learn more here.